

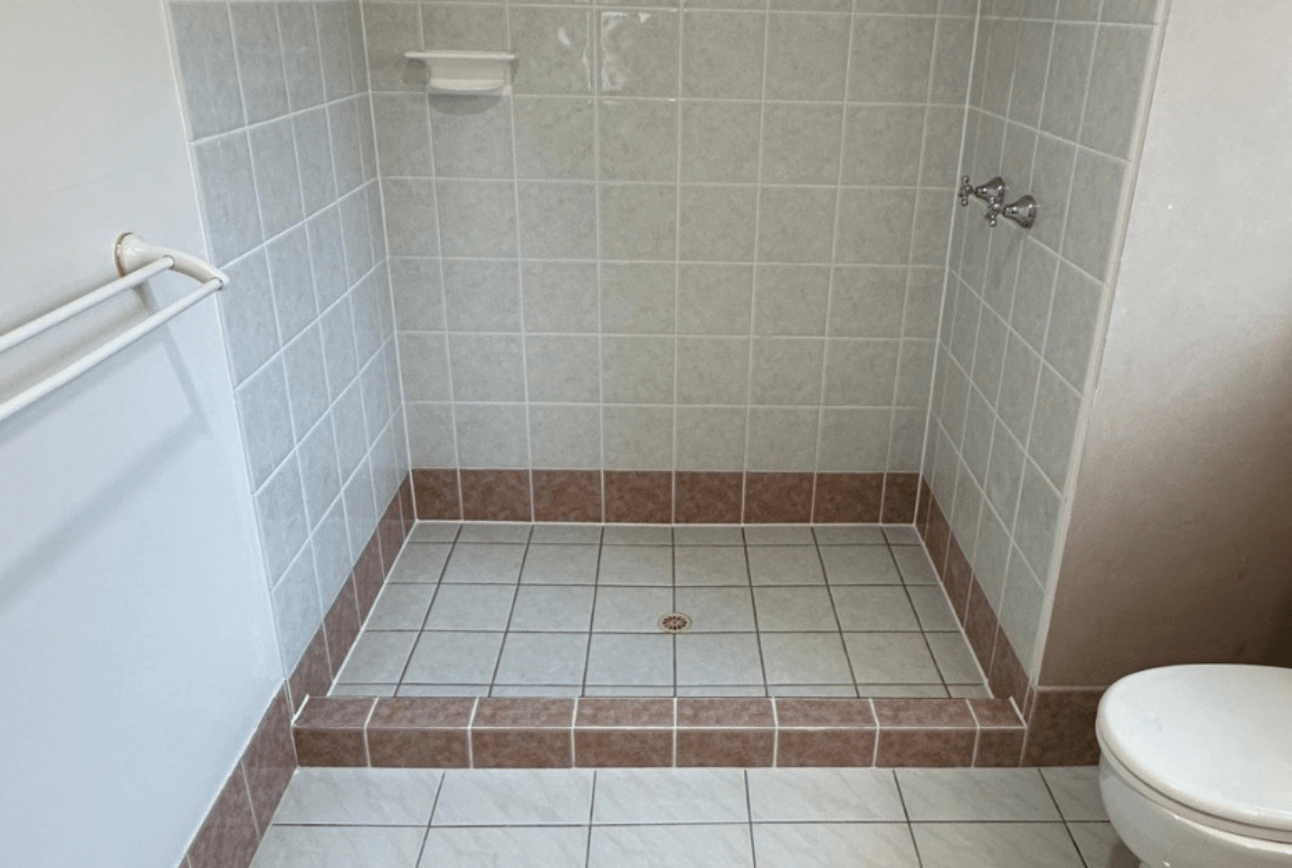
Water is patient. A bathroom leak does not announce itself. It begins as moisture that crosses a boundary it was never meant to cross through a grout joint, past a failed silicone seal, or around a pipe penetration where the waterproofing membrane was never fully sealed. From that point, it moves slowly through the substrate, into the timber framing, and along the floor structure. Weeks pass. The surface looks fine. Then a ceiling stain appears in the room below. Or tiles begin lifting from the floor. Or a musty smell settles into the bathroom that the ventilation never fully clears.
This guide is written for homeowners who want to understand bathroom leakage repair at the level of specificity that actually helps: not a list of vague possibilities, but a clear account of what the different leak sources are; what distinguishes a surface repair from a structural repair; what each type of repair realistically costs; when a licensed professional is required; and how to prevent the same failure from recurring.
The distinction between a leak that is still within the bathroom envelope and one that has already reached the building fabric matters enormously for how it is repaired and what it costs. That distinction is where this guide starts.
The most common reason bathroom leakage repairs fail is that the repair addresses the visible symptom rather than the structural source. A homeowner notices water seeping through grout lines and applies a surface sealant. The sealant covers the grout, but it cannot bond to a contaminated surface and does not penetrate to the waterproof membrane below. The leak continues. Three months later, the sealant begins to crack and peel, and the leak worsens because water is now entering through the failed sealant joint as well.
Bathroom leakage repair is not a surface activity. It is a system activity. The bathroom waterproofing system consists of four layers: the substrate (typically moisture-resistant plasterboard or fibre cement sheet), the waterproofing membrane applied over the substrate, the tile adhesive, and the tile and grout finish. Each layer has a specific function. Water damage occurs when a failure in one layer allows water to reach a layer that was not designed to handle sustained moisture.
The correct repair is always the one that addresses the failed layer, not the one that applies something new over the top of it.
The substrate is the structural base to which the membrane is applied. In residential bathrooms built to the National Construction Code 2022, the substrate is required to be a water-resistant material, typically 10 mm moisture-resistant plasterboard or 6 mm fibre cement sheet. The substrate does not need to be waterproof. It needs to tolerate moisture exposure without structural failure while the membrane above it functions correctly. When sustained water ingress reaches the substrate, it saturates and swells. A swollen substrate creates differential movement that cracks the tile adhesive above it, which then cracks the grout, which then allows more water in. The failure becomes self-reinforcing.
The waterproof membrane is the single component in the system that is intended to be impervious. It is applied as a liquid or sheet product beneath the tiles on all shower floor surfaces and to a minimum height of 1,800mm on shower walls under NCC 2022. It is the membrane that fails in the majority of serious bathroom leaks. Failure modes include insufficient dry film thickness (the membrane was applied too thinly); unbonded junctions (the membrane pulled away from corners during curing because no bond breaker was installed); penetration points that were not sealed (shower arm escutcheons, mixer backing plates, and drain flanges); and product failure (using a membrane that does not meet AS/NZS 4858:2004 Class III in an Australian installation).
The tile adhesive layer transmits mechanical stress from the tile surface down to the membrane and substrate. When the adhesive delaminates, which occurs when the substrate swells or when moisture enters behind the tiles, it loses its grip on both surfaces simultaneously. This produces hollow-sounding tiles and, eventually, detached tiles.
The grout is porous. Standard cementitious grout absorbs water during every shower event. It is not a waterproofing component. Its function is to fill the joints between tiles, provide structural support to tile edges, and present a cleanable surface. When grout fails through shrinkage cracking, chemical degradation, or physical wear, water reaches the adhesive and membrane layers much more quickly. Grout failure is often the first visible sign of a bathroom waterproofing problem, but it is a consequence of substrate and membrane conditions, not solely a cause.
A bathroom contains multiple water containment boundaries, and a leak can originate from any one of them. Correctly identifying the zone of origin is the first step in any bathroom leakage repair. Misidentifying the zone leads to a repair that addresses the wrong component, which is the most common reason professional assessments are sought after failed DIY attempts.
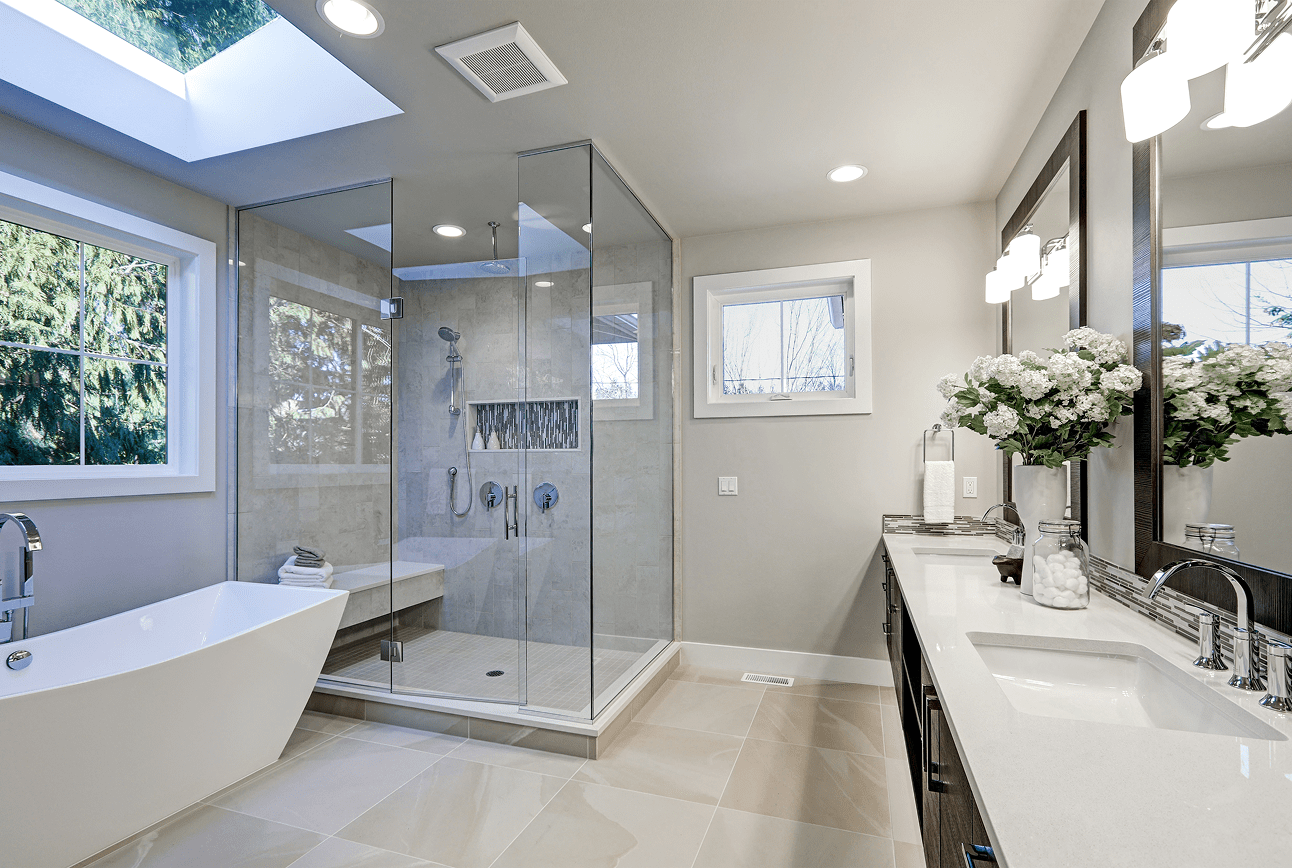
The shower floor is the highest-risk waterproofing zone in any bathroom. It receives the largest volume of water per square metre of any surface in the home during regular use; it is subjected to foot traffic that creates mechanical stress on the adhesive and grout, and it is the zone where the critical junction between the vertical membrane on the walls and the horizontal membrane on the floor must be correctly sealed.
When the shower floor leaks, water tracks downward through the substrate and floor structure. In single-storey homes, this moisture enters the subfloor cavity or slab. In two-storey homes and apartment buildings, it enters the ceiling cavity of the room below, presenting as water staining on plasterboard ceilings often directly beneath the location of the shower drain or in a broader stain pattern corresponding to the shower footprint.
Shower floor leakage is identified through a series of observations: grout lines that have cracked across the full floor surface, tiles that sound hollow when tapped or that have lifted at the edges, a persistent damp smell in the bathroom despite adequate ventilation, a soft or spongy underfoot sensation, and water staining on adjacent ceilings or walls. A professional moisture meter reading of the substrate below the tiles and of the subfloor can confirm active water content without removing tiles.
Shower wall tiles are under different stress from floor tiles. They do not bear foot traffic, but they are subjected to thermal cycling as hot and cold water cycles through the shower events, and the grout joints on the walls are exposed to direct water spray at pressure for the entire duration of each shower. Grout that was correctly applied at installation will begin degrading over time. In Australian residential bathrooms, cement-based shower grout typically shows meaningful deterioration between the five- and ten-year mark, depending on water quality and use frequency.
When wall grout fails, water penetrates behind the tile face and contacts the membrane below. If the membrane remains intact behind the failed grout, the water is contained and eventually evaporates. If the membrane has also deteriorated, which is common in bathrooms constructed before the 2004 version of the standard introduced tighter requirements, the water reaches the substrate and begins accumulating.
Wall tile leakage presents differently from floor tile leakage. The water pathway is more lateral than vertical. Paint peeling or bubbling on the wall adjacent to the shower, particularly at the base of the shared wall, is a common presentation. Damp plasterboard surfaces behind bathroom cabinetry on an adjacent wall. Cracked or missing grout that is visible at shower height. These are all secondary indicators that water has crossed the wall membrane.
The shower screen provides the spatial boundary that prevents water from leaving the shower enclosure during use. The seal between the shower screen base and the shower floor, the silicone beads along the screen frame edges, and the door seal strip on frameless or semi-frameless installations are all boundary components that require maintenance over the life of the bathroom.
Silicone seals around shower screens have a practical service life of five to eight years in typical residential use. The silicone compound degrades through repeated wetting and drying cycles, UV exposure from bathroom lighting, and the mechanical stress of daily door movement. Degraded silicone loses its adhesion to both the tile and the screen frame, develops surface cracking, and eventually separates from one or both bonding surfaces entirely. At that point, water that contacts the screen base travels directly onto the bathroom floor outside the shower zone rather than into the shower drain.
Shower screen seal failure is distinctive because the water appears on the bathroom floor outside the shower enclosure, not below it. Puddles that persist outside the shower after every use, despite the drain functioning correctly; discolouration or mould growth on the outer face of the screen base silicone; and visible gaps between the screen frame and the floor tile surface are all presentations of shower screen seal failure.
Every bathroom contains multiple penetrations through the waterproofing membrane: the shower arm penetrating the wall, the mixer valve body, the bath tap connections, the toilet cistern supply, and the drain flange in the shower floor. Each penetration is a potential entry point for water if the seal around it was not correctly installed or has since deteriorated.
The shower arm escutcheon, the decorative plate that covers the hole in the wall tile where the shower arm enters, is one of the most commonly overlooked leak sources in bathroom repair assessments. If the escutcheon is not sealed to the wall tile surface with silicone or the sealant has dried out and separated, every shower event pushes water pressure against that gap. Water enters the wall cavity at the escutcheon joint and tracks down through the wall structure.
Mixer valve body leakage is a different matter. When the internal cartridge inside a wall-mounted shower mixer wears out, water bypasses the valve seat and drips continuously from the shower head even after the tap is fully closed. This is not a wall membrane issue. It is a plumbing component issue. Under Australian plumbing regulations, replacement of a shower cartridge or any internal valve component constitutes restricted plumbing work and must be carried out by a licensed plumber. In New South Wales, Queensland, and Victoria, this is a statutory requirement, not an optional precaution.
The floor outside the shower recess in an Australian bathroom, typically covered in tiles, is required to be water-resistant but is not required to be fully waterproofed under NCC 2022 unless it is an unenclosed shower zone. This distinction matters because water that regularly reaches the general bathroom floor from splashing, poor drainage gradient, or condensation can, over time, penetrate porous grout on the floor tiles and begin saturating the subfloor substrate.
General bathroom floor leakage is slower in development than shower zone leakage and typically presents first as discoloration of grout on the bathroom floor, mould growth at the floor-wall junction, and eventually as water staining on the ceiling below in two-storey homes. Bathroom floor grout is often overlooked in annual maintenance because it does not show the same visible cracking patterns as shower floor grout under mechanical stress.
The bath is a large water-bearing fixture with silicone seals at every junction with wall tiles and floor tiles. The bath rim seal, the silicone bead between the bath flange and the adjacent wall tile, fails through the same mechanisms as shower screen silicone: degradation, cracking, and separation. When the bath rim seal fails, water that splashes during bathing enters the gap between the bath flange and the wall tile and tracks into the wall cavity.
Vanity units present a different leakage risk. The basin drain connection, the tap connections, and the waste pipe joints all sit inside the vanity cabinet and are not routinely inspected. A slow drip at the waste pipe compression fitting or a loose basin drain nut can run water into the vanity cabinet, into the subfloor, and eventually through the ceiling below without ever becoming visible at the surface.

The question of whether bathroom leakage can be repaired without removing tiles is the most commonly asked in this topic area, and it deserves a precise answer rather than a vague one.
Non-invasive bathroom leakage repair carried out without tile removal is an appropriate solution under a specific set of conditions. When those conditions are not met, applying a non-invasive repair to a situation that requires structural intervention results in a failed repair, further water damage, and ultimately a more expensive job than if the correct approach had been taken from the start.
Non-invasive repair is appropriate when the waterproof membrane beneath the tiles is structurally intact, and the leakage is occurring only through failed grout joints, failed silicone seals, or deteriorated pipe penetration seals. In this scenario, the membrane itself is still functioning as a barrier, but water is bypassing it through surface-level failures. Regrouting the shower, resealing the screen, and resealing the pipe penetrations restores the surface-level containment without needing to access the membrane.
Non-invasive repair is not appropriate when the membrane has failed. A failed membrane cannot be repaired through the surface. A liquid-applied product spread over new grout does not bond to a membrane that is located beneath a tile adhesive layer. It bonds to the grout surface only, and that bond fails quickly under thermal cycling and water pressure. The only way to repair a failed waterproof membrane is to access it, which means removing the tiles above it.
The practical test for whether tiles need to be removed is a professional moisture meter assessment of the substrate below the tile layer. If the substrate moisture content is consistently elevated across multiple measurement points, the membrane has already been breached, and tile removal is required. If substrate moisture is within the normal range and the leak source is identifiable at the surface, non-invasive repair is viable.
Bathroom regrouting is the process of removing all existing grout from the joints between tiles in the shower and bathroom floor, preparing the joint surfaces, and applying new grout material. It is the correct repair for grout that has cracked, shrunken, discolored, or become porous through normal service life.
The material choice for regrouting in a wet area matters significantly. Standard cement-based grout, which is the most common material used in residential tile installations, is porous and will absorb water throughout its service life. Professional regrouting services in bathrooms use epoxy-based grout as the replacement material. Epoxy grout is chemically resistant, near-impervious to water absorption, and significantly more resistant to mould growth than cement-based grout. Correctly applied epoxy grout in a residential shower can last fifteen years or more without requiring replacement. The material cost is higher than cement-based grout, and the application is more technically demanding, but the service life differential makes it the correct choice for a bathroom that has already experienced grout failure.
Regrouting does not fix a failed membrane. It fixes failed grout in a bathroom where the membrane is intact.
Bathroom silicone resealing is the removal of all existing silicone from movement joints, screen seals, bath rim seals, and pipe penetration seals, followed by surface preparation and application of new silicone sealant rated for wet areas. Silicone reseal is the correct repair when the existing silicone has degraded, but the underlying surfaces are in sound condition.
The scope of a professional silicone reseal in a full bathroom typically includes the shower screen base and frame edges, all internal corners within the shower recess (floor to wall and wall to wall), the bath rim seal, the tap escutcheon seals, and the vanity connection seals. Attempting to apply new silicone over existing degraded silicone without fully removing the old material is a common error that produces adhesion failure within weeks. New silicone will not bond to old, degraded silicone. The old material must be completely removed and the surface cleaned with isopropyl alcohol before new silicone is applied.
Mould-resistant sanitary silicone, rated specifically for continuously wet environments, is the correct product for bathroom applications. Standard clear silicone or construction silicone is not rated for continuous moisture exposure and will develop surface mould within months in a bathroom environment.
Cost is the question behind most bathroom leakage repair decisions, and vague ranges help no one. The figures below reflect the realistic market in Australian capital cities in 2025 and are provided as indicative price ranges for professional repair work. Individual quotes will vary based on bathroom size, extent of damage, access conditions, and the specific contractor’s cost structure.
Combined regrouting and full silicone reseal as a single engagement: AUD $550 to AUD $1,200 for a standard single bathroom.
For situations where the waterproof membrane has failed at specific joints or penetration points but the overall membrane integrity is still partially sound, specialist injection systems exist that can inject flexible waterproofing compound into the joint or penetration from the surface. This technique is used by waterproofing specialists and requires professional assessment to determine whether the specific failure mode is suitable for injection treatment.
Non-invasive membrane injection repair: AUD $ 600 to AUD $2,000 depending on the extent and location of membrane failure, and whether additional surface preparation is required.
When the waterproof membrane has failed across a significant portion of the shower floor or walls, and the substrate shows elevated moisture content or structural damage, a full wet area strip and rebuild is required. This involves removing all tiles and grout, stripping back to the substrate, assessing and repairing or replacing the substrate, applying a new AS/NZS 4858:2004 Class III compliant membrane to AS 3740:2021 installation standards, and retiling.
When the source of a bathroom leak cannot be confirmed through visual inspection, professional leak detection uses thermal imaging cameras, acoustic sensors, and calibrated moisture meters to locate the water pathway without opening walls or removing tiles. Thermal imaging identifies temperature differentials in wall and floor surfaces caused by the evaporative cooling effect of moisture behind the substrate. Acoustic sensors detect the sound signature of water movement through porous materials.
Professional bathroom leak detection inspection: AUD $200 to AUD $550. This fee is typically deducted from the repair invoice by contractors who offer both services.
The opinion stated here is that paying for professional leak detection before engaging a contractor for an extensive repair is always worthwhile when the leak source is unclear. A 300 inspections that correctly identify a failed mixer cartridge, thanafai-led membrane can prevent a 300 inspection that correctly identifies a failed mixer cartridge, whereas a failed membrane can prevent 5,000 strips and rebuild from being carried out unnecessarily. Getting the diagnosis correct before committing to the repair is not overcaution. It is basic proper
Mixer cartridge replacement in a shower or bath tap: AUD $180 to AUD $500, including parts and labour. The cost varies significantly based on the brand of tapware, as cartridges are brand-specific components and premium brands carry higher parts costs. Common Australian brands include Caroma, Methven, Kohler, Grohe, and Milli.
Pipe penetration seal repair carried out by a licensed plumber: AUD $150 to AUD $350, depending on access complexity.
Any repair involving the water supply line, valve body, internal pipe connections, or drainage fittings in an Australian bathroom must be carried out by a licensed plumber. In New South Wales, Queensland, Victoria, and South Australia, this is a statutory requirement. Unlicensed plumbing work is not insured, is not covered by statutory warranties, and may create liability and disclosure obligations at property sale.
Bathroom leaks can cause costly water damage if left untreated, so addressing the problem early is essential.
This is one of the few bathroom leakage repairs that a confident homeowner can carry out without trade qualifications, provided the scope is limited to silicone reseal at the shower screen and the underlying surfaces are in sound condition.
The materials required are: a silicone removal tool or a sharp utility knife, 100% isopropyl alcohol (available at hardware stores), masking tape, a tube of mould-resistant sanitary silicone sealant in the correct colour, and a plastic smoothing tool or a gloved finger for joint finishing.
Begin by cutting away the full length of the existing silicone using the utility knife. Make a shallow cut along both edges of the silicone bead along the glass face and along the tile surface, then remove the bead in one piece if possible, or in sections. Do not score the tile surface. Use the silicone removal tool to clean the residue from both the tile and the glass frame. This step takes longer than expected and is the most critical part of the process. Any silicone residue left on either surface will prevent the new sealant from bonding correctly.
Wipe both surfaces with isopropyl alcohol and allow to dry completely. Apply masking tape along both edges of the joint, one strip on the glass, one strip on the tile, to produce a clean finished edge on the new bead. Apply the silicone in a continuous bead from one end of the joint to the other. Smooth immediately with a gloved finger or tool, pressing firmly into the joint. Remove the masking tape while the silicone is still wet. Allow the silicone to cure for the minimum time specified on the product packaging, typically 24 hours, before the shower is used.
Professional regrouting of a bathroom shower begins with mechanical removal of all existing grout using an oscillating multi-tool with a grout removal blade, an angle grinder with a diamond grout removal disc, or a hand grout saw for narrow joints. The objective is to remove grout to a minimum depth of 6mm in all joints to allow the new grout material sufficient bond depth. Removal to less than this depth produces a thin surface layer that delaminates quickly.
After removal, all joints are vacuumed and the surfaces wiped clean with a damp cloth. Any remaining adhesive or silicone residue in the joints must be removed before new grout is applied.
Epoxy grout is a two-component system, a resin part and a hardener part that must be mixed immediately before use. The working time of mixed epoxy grout is typically 20 to 45 minutes at temperatures above 20 degrees Celsius. In Australian summer conditions, working time is shorter, requiring smaller mixing batches. Epoxy grout is applied into the joints with a rubber float at a 45-degree angle to the tile surface, forcing the material firmly into the depth of the joint. The tile faces must be cleaned of epoxy residue while the material is still fresh using the manufacturer-specified cleaning solution. Epoxy grout that cures on tile faces before being cleaned requires acid cleaning to remove, which risks tile surface damage.
After initial curing, all internal corner joints, floor to wall and wall to wall, are left open and filled with silicone sealant rather than grout. This is a requirement of AS 3740:2021 because corner joints must remain flexible to accommodate building movement. Grout is rigid and cracks at corners. Silicone accommodates movement.
Membrane repair is not a DIY activity. The repair sequence that follows describes what a licensed waterproofing contractor carries out to restore a bathroom to AS 3740:2021 compliance.
Tiles are removed carefully using a flat pry bar, beginning at one edge of the repair zone. In a full strip, all tiles are removed. In a partial strip, tiles are removed to expose the failed membrane area plus a minimum of 150mm beyond the visible failure boundary in all directions. Tile adhesive is then ground from the substrate surface using a hand grinder or scraper until the substrate surface is clean and sound.
The substrate is inspected for moisture content using a moisture meter. Substrate panels with readings above 12% moisture content are replaced rather than dried in place, because a saturated substrate that has been wet for an extended period may have developed fibre degradation that compromises its structural integrity even after it dries.
The new membrane is applied as a liquid system. The first coat is applied by brush and rolled across the full substrate surface. All corners receive a reinforcing membrane fabric bandage embedded in the first coat, applied while wet, and smoothed flat. The fabric bridges the corner junction and provides flexibility at the movement joint. The first coat is allowed to cure to the minimum touch-dry state specified by the manufacturer, typically four to six hours in moderate Australian conditions.
The second coat is applied perpendicular to the first to ensure even coverage and eliminate any pinholes in the first coat. The specified dry film thickness is a minimum of 0.8mm for standard membrane products in a shower application. Under-application is the most common membrane installation defect and is not visible once the tiles are installed.
All penetrations, shower arm, mixer backing plate, and drain flange are sealed with membrane-compatible sealant and covered with membrane product before the body of the membrane is applied. The drain flange receives a membrane collar that integrates the floor membrane with the drain body, preventing water from bypassing the drain perimeter.
After full membrane cure, typically 24 to 48 hours, a water test is carried out. The shower drain is plugged, and the shower recess is filled with water to a minimum depth of 25mm. The water level is marked and left for 24 hours. If the water level drops, the membrane has a pinhole or a failed junction and must be repaired before tiling proceeds. Proceeding to tile installation without a successful water test is a defect that will be repeated after the tiles are installed.
The selection of the right contractor for bathroom leakage repair is not a decision based on price alone. Bathroom waterproofing work in Australia is licensed trade work. An unqualified person applying membrane in a bathroom shower is not simply doing a cosmetic job badly — they are applying a product that will be concealed beneath tiles for ten to fifteen years and cannot be inspected without removing those tiles. If it is applied incorrectly, the defect may not present until significant structural damage has already occurred.
In New South Wales, waterproofing work in bathrooms requires a contractor to hold a licence from NSW Fair Trading in the relevant category. The Home Building Act 1989 (NSW) defines waterproofing as specialist work requiring a Specialist Work Licence.
In Queensland, waterproofing work is carried out under a Queensland Building and Construction Commission (QBCC) licence. The licence class relevant to bathroom waterproofing is Waterproofing, and QBCC licence numbers can be verified online at the QBCC licence check portal.
In Victoria, building work, including waterproofing, is regulated by the Victorian Building Authority (VBA). A Domestic Builder licence is required for bathroom waterproofing work in Victoria, and the VBA register is publicly searchable.
In South Australia, the Consumer and Business Services register covers building contractor licensing, including waterproofing.
Requesting and verifying a contractor’s licence number before engaging them is not a bureaucratic formality. It is the only mechanism by which a homeowner can confirm that the contractor’s work is covered by statutory warranties and that the work is insured.
The cost trajectory of an unrepaired bathroom leak is not linear. It does not get slightly worse at a constant rate. It accelerates. The water damage in the first month is minimal. By month six, the timber framing adjacent to the shower is beginning to hold moisture at levels that promote biological growth. By month eighteen, the timber has begun to soften. By year three, the subfloor structure in a two-storey home may require structural repair as well as bathroom strip and rebuild.
Three specific consequences follow from sustained, unrepaired bathroom leakage, and understanding them changes the urgency calculation for homeowners who are aware of a leak but have postponed acting on it.
Mould spores are present in every residential environment. They are inert until they have sustained moisture and an organic substrate to grow on, both of which exist inside a leaking bathroom wall cavity. Mould growth begins within 24 to 48 hours of a moisture event in warm conditions. At the 15 to 25-degree Celsius ambient temperatures common in Australian residential interiors, mould colonies can establish fully within a week of sustained water ingress.
Mould inside bathroom wall cavities is not visible at the surface. It grows on the paper face of moisture-resistant plasterboard, on the timber framing studs and nogging, and on the back of tiles where the tile adhesive has absorbed moisture. It is discovered when walls are opened during repair work, typically presenting as black or dark green surface coverage across the substrate behind the tiles.
Mould remediation, if required in addition to waterproofing repair, adds AUD $300 to AUD $800 to the cost of the job, depending on the extent and the treatment required. In severe cases where mould has penetrated through the plasterboard substrate, the substrate must be replaced rather than treated.
Untreated structural timber in contact with sustained moisture begins to deteriorate through fungal decay. In Queensland, Victoria, and New South Wales, the most common framing timber species in residential construction, pine framing, generally treated for termite resistance but not for prolonged moisture exposure, will begin to show surface softening and discolouration within six months of continuous moisture contact above 20% moisture content.
Timber rot in the floor framing beneath a leaking shower presents as a soft or bouncy floor structure, which can sometimes be felt in the bathroom floor but is more reliably identified through subfloor access. Once the rot has progressed beyond the surface of the member, the structural capacity of the timber is reduced, and the affected member must be replaced.
Structural timber replacement in the subfloor adjacent to a leaking shower adds AUS $ 800 to AUD $2,500 to the total repair cost, not including the cost of the bathroom work itself. In a severe case where the rot has spread to multiple floor joists or to the wall plate, the structural repair cost can exceed the bathroom repair cost.
In two-storey homes and apartment buildings, the sequence of damage from an unrepaired bathroom leak follows a predictable path: water exits the shower floor membrane, saturates the subfloor concrete or timber deck, migrates through to the ceiling lining of the room below, and eventually stains, softens, and in advanced cases causes the ceiling lining to sag or fail.
Plasterboard ceiling repair for water damage typically costs AUD $350 to AUD $1,200 per ceiling area affected, depending on the extent of damage and whether the ceiling framing above the plasterboard has also been water-affected.
In apartment buildings, a bathroom leak from an upper-floor unit affecting the ceiling of the unit below creates an inter-tenancy liability question. The body corporate or strata manager typically requires the source of the leak to be professionally assessed and the repair to be carried out under licence before any structural or ceiling repair in the affected unit can be approved. This adds coordination complexity and time to the repair process in strata-titled properties.
Bathroom waterproofing failures are, in the majority of cases, not sudden events. They are the result of the gradual deterioration of surface-level components that were not maintained within their service life. A bathroom maintenance schedule that addresses the components that deteriorate on a predictable timeline prevents the majority of significant leakage events from developing.
Inspect all silicone seals in the bathroom: shower screen base and edges, internal shower corners, bath rim, tap escutcheons, and vanity connection seals. Look for discoloration, surface cracking, or separation from either bonding surface. A silicone seal that has begun to separate should be removed and replaced before the next wet season, not at the point of visible water ingress.
Check all grout in the shower for hairline cracks. Run a finger firmly along grout lines. Grout that crumbles or powders under finger pressure has reached the end of its serviceable life and should be regrouted. Grout that resists pressure and shows no cracking does not require immediate attention.
Inspect the shower drain, the drain grate, the drain body, and the drain flange seal at the membrane. Hair and soap accumulation in the drain restricts water drainage, which increases the head pressure of water standing in the shower recess and increases the rate of water penetration through any micro-cracks in the floor grout.
A professional inspection by a licensed waterproofing specialist using a moisture meter to assess the substrate moisture content behind shower tiles and bathroom floor tiles provides data that is not obtainable through visual inspection alone. A bathroom that shows no surface defects can have a substrate moisture content that indicates active water ingress, and catching this before tile failure begins is significantly less expensive than addressing it after tiles lift.
Professional bathroom moisture assessment: AUD $150 to AUD $350 for a standard single bathroom. This cost is negligible relative to the cost of repairs that could have been identified earlier.
Residential water supply pressure in Australia is regulated to a maximum of 500 kilopascals (kPa) at the property boundary under AS/NZS 3500.1. Pressure above this level causes premature wear on all rubber seals, O-rings, and cartridges throughout the bathroom plumbing. Shower mixer cartridges that are rated for a service life of ten to fifteen years at normal operating pressure may fail at seven to ten years in a bathroom with sustained high supply pressure.
A pressure-limiting valve (PLV) installed at the main water supply connection can bring supply pressure within a range that does not accelerate seal degradation. PLV installation costs AUD $ 300 to AUD $600 and must be carried out by a licensed plumber. In high-pressure supply areas, this is one of the most cost-effective preventive measures available for reducing the frequency of plumbing and waterproofing-related repairs across a property.
A professional bathroom leakage repair service from a qualified contractor covers a diagnostic assessment that determines the source and extent of the leak, a scope of work that addresses the actual failed component, and a repair that restores compliance with the relevant Australian standards. The following describes what a comprehensive service should include.
The assessment phase begins with a visual inspection of all visible bathroom surfaces, including grout condition, silicone condition, screen seal condition, and tile adhesion. This is followed by a moisture meter survey of the substrate behind the shower floor and walls, and of the adjacent wall and floor surfaces outside the shower zone. In bathrooms where the leak source is not identifiable through surface inspection and moisture metering, thermal imaging may be used to identify moisture pathways behind surfaces.
The outcome of the assessment is a diagnosis that identifies which zone the leak is originating from and what repair approach is appropriate. A diagnosis should be provided in writing, with the reasoning clearly stated.
Waterproofing repair work should be referenced explicitly to AS 3740:2021. The contractor should be able to identify the specific requirements of the standard that apply to the repair scope, minimum waterproofed heights, junction treatment requirements, membrane product standards, and drain flange sealing requirements, and confirm that the repair meets those requirements. A contractor who cannot reference the standard by name and number is not working to it in practice.
On completion of the repair, a licensed contractor should provide a written record of the work carried out, the products used (including the product names, manufacturers, and compliance standard references), the results of the water test, and the warranty period applicable under state legislation. This documentation is relevant for property disclosure obligations in a future sale and for any insurance claim that references the repair history of the bathroom.
Before engaging a professional, a homeowner can carry out a simple two-part test that distinguishes between a shower tray or drain leak and a supply-side or pipework leak. This test does not require any specialist equipment and takes less than an hour to run. It was developed by leak detection practitioners in the United Kingdom and has direct application to Australian bathroom conditions.
The test works by isolating the two possible water sources: the standing water in the shower base and the pressurised supply water from the shower head and mixer, and testing each one independently.
Block the shower drain with a drain plug or a rubber bung sized to fit the drain opening (available at hardware stores for under $10). Fill the shower recess with water to a depth of approximately 50mm using a bucket. Do not turn on the shower. Once the water is at depth, mark the waterline on the shower wall with a small piece of tape. Leave the shower undisturbed for 20 to 30 minutes. Do not use any other water in the property during the test period, as water usage can affect the results by creating pipe vibration.
After 30 minutes, return to the shower and check two things. First, whether the water level in the shower has dropped below the tape mark. A drop indicates that the shower floor membrane or drain seal is leaking water is passing through the floor even without any supply pressure involved. Second, go to the room below the bathroom (if applicable) and check the ceiling for any new moisture or dripping.
If the water level has not dropped and there is no moisture visible below, the shower tray and drain seal are intact. The leak is occurring on the supply side. Proceed to Part Two.
If the water level has dropped, the shower floor membrane or drain flange seal has failed, and professional repair is required. The extent of the drop, slow drip versus significant fall, indicates the severity of the failure.
Remove the drain bung from Part One and allow the accumulated water to drain fully. Now run the shower normally using the shower head and mixer as usual for five to ten minutes. At the conclusion of this test, check the following: any new water on the bathroom floor outside the shower zone, any new dripping from pipe penetrations in the wall (the shower arm escutcheon, the mixer backing plate), and any moisture visible on the ceiling of the room below.
If moisture appears on the ceiling only during this test and not during Part One, the leak is occurring through the shower floor under supply pressure or through wall penetrations rather than through the base seal. This points to a membrane failure that is pressure-dependent, a common presentation in showers where the membrane has delaminated from the substrate but has not fully detached.
If no moisture appeared in either test, the bathroom leak may be occurring through condensation rather than through a waterproofing failure. Condensation is addressed in the following section.
The two-part test is a triage tool, not a diagnosis. It narrows the zone of likely failure. It does not replace a professional moisture meter assessment.
Not every moisture problem in a bathroom is a waterproofing failure. Condensation the conversion of water vapour in warm, humid bathroom air to liquid water as it contacts cooler surfaces, produces moisture that can mimic the appearance of a leak. Distinguishing between condensation and genuine water ingress prevents unnecessary repair expenditure and directs attention to the correct solution.
When a hot shower runs in a bathroom with inadequate ventilation, the air inside the bathroom reaches the saturation point, 100% relative humidity. At that point, water vapour condenses on every cool surface in the room: tiles, glass, walls, and ceiling. If the bathroom exhaust fan is undersized, obstructed, or non-functional, the condensation has no route out of the bathroom and accumulates on surfaces.
Sustained condensation on bathroom walls produces paint peeling and bubbling, mould growth on grout lines and silicone (particularly on the ceiling and upper wall areas where condensation is heaviest), staining of the ceiling plasterboard, and, in severe cases, softening of the ceiling lining. All of these are also symptoms of genuine bathroom leakage, which is why condensation is frequently misidentified as a waterproofing problem.
The key diagnostic difference is the location and pattern of the moisture. True waterproofing failures produce moisture that tracks downward from the leak source. Floor membrane failures produce ceiling staining directly below the shower footprint, and wall membrane failures produce moisture at the base of adjacent walls. Condensation produces moisture at the highest point of the bathroom. The ceiling is distributed across the full ceiling area rather than concentrated under the shower zone.
A secondary test is to check the ceiling of the room below the bathroom after a shower event. If the ceiling below is unaffected but the bathroom ceiling shows moisture, condensation is the more probable explanation. If the ceiling below also shows moisture, water is physically penetrating through the floor structure, and condensation is not the cause.
The Australian standard for bathroom ventilation is HB 39:1997 (SAA Handbook on Domestic Services), which specifies exhaust fan capacity requirements for wet areas. A bathroom exhaust fan rated for the room volume of the bathroom, correctly positioned to draw humid air out of the room rather than recirculating it within the room, and maintained be clear of lint and grease accumulation, removes the conditions that produce sustained condensation.
Exhaust fan replacement or upgrading: AUD $150 to AUD $400 installed by a licensed electrician. A bathroom exhaust fan that is more than ten years old, makes noise during operation, or fails to clear mirror fogging within five minutes of the shower being switched on is not performing its function adequately.
Running the exhaust fan for a minimum of 15 minutes after the shower is switched off is a simple behavioural change that reduces post-shower condensation significantly. Many condensation problems in Australian bathrooms are resolved by this single practice change rather than by any structural repair.
Bathroom leakage in an apartment or strata-titled property introduces legal and coordination considerations that do not apply to freestanding residential homes. The question of who is responsible for the repair, who bears the cost, and how the repair is coordinated with body corporate processes is a source of significant confusion and delay in strata bathroom leakage situations.
In Australian strata law, the responsibility for bathroom leakage depends on the location of the failed component relative to the lot boundary.
Water supply pipes that are within the lot, from the isolation valve inside the lot boundary to the taps and fixtures, are the lot owner’s responsibility. Pipes that are in the common property, such as the supply mains, the drainage stacks, and any pipes servicing more than one lot, are the owners’ corporation’s responsibility.
Waterproofing membranes in bathrooms are within the lot and are the lot owner’s responsibility in most strata schemes, unless the strata scheme’s by-laws or management statement allocate responsibility differently. This means that a lot owner whose shower floor membrane has failed is responsible for the cost of the membrane repair, even if the resulting damage is in the ceiling of the lot below.
The damage caused by the leak in the lot below, including the ceiling staining and the plasterboard repair, is typically the responsibility of the body corporate’s building insurance in the first instance. However, if the insurance excess is high or the claim would affect the scheme’s premium, the body corporate may seek to recover costs from the lot owner whose bathroom failure caused the damage. Reviewing the specific by-laws of the strata scheme and consulting a strata lawyer or manager before committing to any repair approach is advisable.
In a strata building, the practical repair process typically follows this sequence: the affected lot owner or the lot below notifies the strata manager that a leak is occurring. The strata manager coordinates a professional leak detection inspection to identify the source. If the source is within a lot, the lot owner is notified and is required to arrange repair under licence within a reasonable timeframe. If the source is in common property, the owners’ corporation arranges the repair.
The bodies corporate in most states have by-law provisions requiring lot owners to maintain their lot so as not to cause damage to other lots or common property. A lot owner who is aware of a bathroom leak and does not act on it may be held liable for subsequent damage to the lot below under these provisions.
For apartment bathroom repairs in New South Wales, the relevant legislation is the Strata Schemes Management Act 2015. In Queensland, the Body Corporate and Community Management Act 1997. In Victoria, the Owners Corporations Act 2006. Each act specifies the allocation of maintenance responsibilities and the process for resolving disputes between lot owners and the body corporate.
A leaking bathroom is a progressive maintenance issue that requires prompt intervention before water saturates structural framing studs, rots timber floor joists, or degrades plasterboard ceilings in the room below. While basic surface issues like a dripping shower head connection can be resolved with simple DIY tools and a new washer, leaks originating from compromised waterproof membranes, failed floor grout, degraded silicone joints, or worn mixer cartridges require professional, licensed trade intervention to ensure compliance with Australian standards.
Accurately diagnosing the active leak zone and identifying whether the leak is a surface-level issue or a structural system breach is the key to preventing failed, repetitive repairs. By maintaining a regular inspection schedule, managing home water pressure below the 500 kPa threshold, and selecting qualified, licensed contractors who provide compliance certifications and statutory warranties, property owners can protect their structural building fabric and avoid the high costs of structural remediation.
The most reliable indicators of bathroom leakage are: water staining on the ceiling of the room directly below the bathroom, a persistent damp or musty smell in the bathroom that does not clear after ventilation, tiles that sound hollow when tapped or that have lifted at the edges, grout that is crumbling or cracked across multiple joints, soft or spongy underfoot sensation on the shower floor, and visible mould at the base of bathroom walls outside the shower zone. Any single indicator warrants a professional moisture assessment. Multiple indicators together suggest active water damage that requires immediate attention.
In some situations, yes. When the waterproof membrane beneath the tiles is intact and the leak is occurring through failed grout joints or failed silicone seals, professional regrouting and silicone resealing can restore waterproof integrity without tile removal. When the membrane has failed and the substrate shows elevated moisture content, tile removal is required to access and repair the membrane. A professional moisture meter assessment is the correct method to determine which situation applies.
The correct solution for bathroom leakage is the one that addresses the actual failed component, not the one that causes the least disruption. Surface sealants applied over failed grout provide short-term cosmetic improvement and fail quickly. Professional regrouting with epoxy grout addresses grout failure correctly. Silicone reseal addresses seal failure correctly. Waterproof membrane repair addresses membrane failure correctly. The only way to determine which solution is appropriate is to diagnose the actual source and extent of the failure through professional inspection.
A bathroom regrouted with epoxy grout by a professional, with internal corners resealed in silicone, should not require further grout repair for fifteen years or more under normal residential use. A shower screen silicone reseal has a practical service life of five to eight years before re-inspection, and potential replacement is appropriate. A full wet area strip and rebuild with a new AS/NZS 4858:2004 Class III compliant membrane installed to AS 3740:2021 standards should last the full lifecycle of the bathroom, typically thirty years or more, before the membrane itself requires replacement, provided surface maintenance is carried out on the schedule described above.
Most Australian home and contents policies cover sudden and accidental water damage, for example, a burst pipe, but exclude gradual water damage resulting from a maintenance issue that was not addressed. A bathroom leak that has been present and building for months before it is reported to an insurer will typically be excluded from coverage because it was a maintenance issue. The specific Product Disclosure Statement of the individual policy determines coverage. In cases of significant structural damage from a long-running bathroom leak, the insurer may request evidence of what was done to address the leak and when. Documentation of repair history is relevant to this question.