Grout is not a permanent material. Over time, grout lines crack, discolour, and crumble, allowing moisture to reach the substrate beneath your tiles. When that happens, regrouting floor tiles is the repair that stops further damage and restores the surface without the cost and disruption of a full tile replacement.
This guide covers everything you need to know before starting a regrout floor tiles project: what the job involves, which materials are required, how the process is carried out step by step, what it typically costs in Australia, and when professional help makes more sense than doing it yourself.
Regrouting is the process of removing deteriorated grout from tile joints and replacing it with fresh material. Grout joints are the narrow gaps typically between 1.5 mm and 10 mm wide that separate individual tiles and are filled with a cement, epoxy, or polymer compound to seal the surface. When grout is intact, it performs three functions:
When grout fails, all three of these functions are compromised. Water gets into the substrate. Tiles become unstable. The appearance of the floor deteriorates. Left unaddressed, grout failure can lead to subfloor damage, mould growth, and, eventually, the need for full tile removal, a far more expensive outcome than timely regrouting.
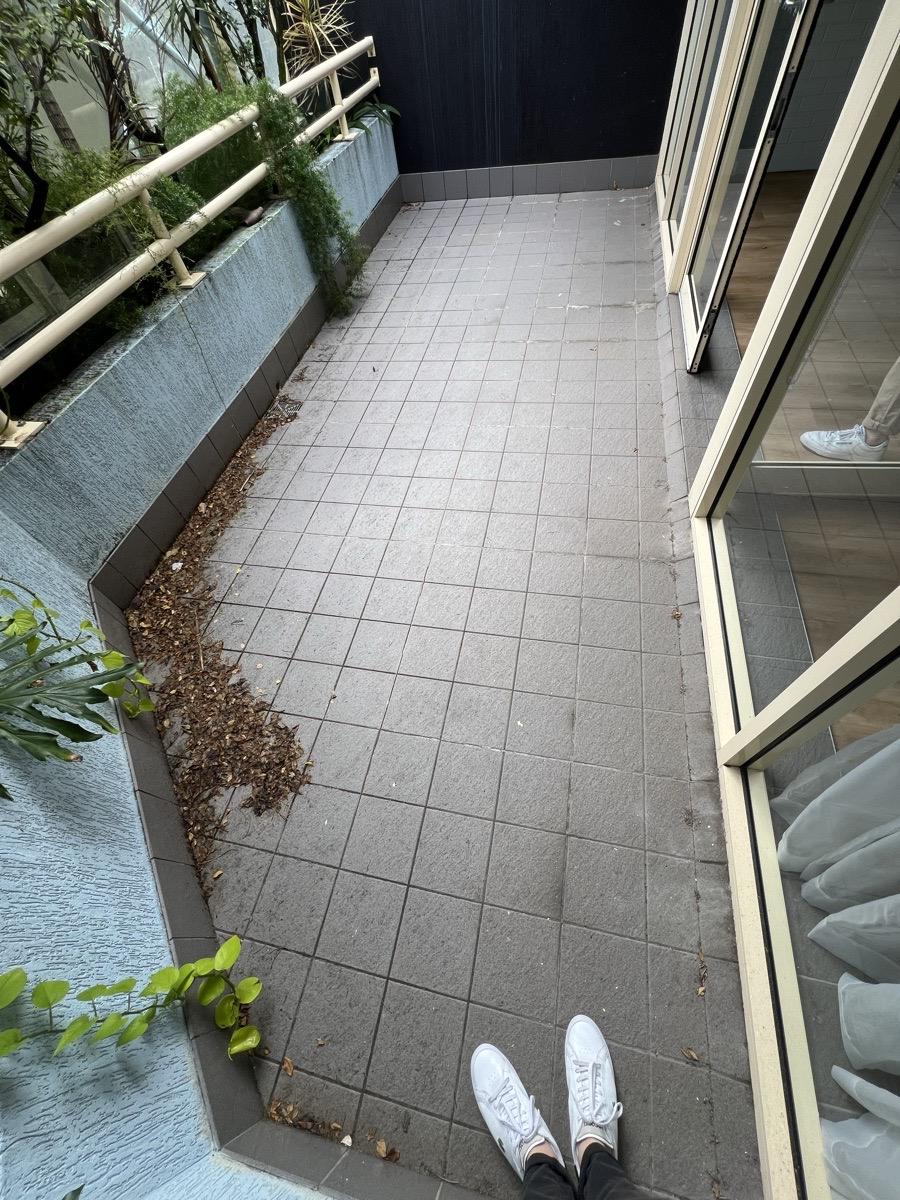
Most grout does not fail overnight. The signs are gradual, and it is worth checking regularly to catch the problem early.
Most grout professionals in Australia note that cement-based grout in wet areas such as bathrooms and laundries begins to deteriorate after five to eight years of regular use. Epoxy grout lasts significantly longer, often fifteen to twenty years, before needing attention.
There is no universal schedule. Frequency depends on the grout type, level of water exposure, foot traffic, and the quality of the original installation. As a general reference:
Area | Typical Regrouting Interval |
High-traffic bathroom floor | Every 8 to 12 years |
Shower floor (daily use) | Every 5 to 8 years |
Kitchen floor (moderate traffic) | Every 10 to 15 years |
Laundry or wet area floor | Every 8 to 12 years |
Low-traffic living room floor | Every 15 to 20 years |
These intervals assume cement-based grout. Epoxy grout significantly extends the cycle across all categories.
The type of grout used affects project cost, application method, final durability, and required maintenance. There are three main types used in Australian residential and commercial floor tiling.
Cement-based grout is the most widely used type in both sanded and unsanded forms. Sanded grout contains fine sand aggregate and is used in joints wider than 3 mm. The sand gives it greater structural strength for wider gaps.
Unsanded grout is used in narrow joints (under 3 mm) and on surfaces such as polished stone or glass where sand particles would scratch the tile face. Cement grout is affordable and easy to apply, but it is inherently porous. It absorbs moisture and stains readily if not sealed and requires periodic resealing to maintain water resistance.
Epoxy grout is a two-component system consisting of epoxy resin and a hardener. Once cured, it is chemically resistant, waterproof, and highly stain-resistant. It does not require sealing and is the preferred choice for shower floors, commercial kitchens, and any area subject to frequent or prolonged water exposure.
The trade-off is cost and workability. Epoxy grout is more expensive than cement-based alternatives and requires careful, experienced application. It sets quickly, which makes it difficult for inexperienced users to work with over large areas.
Polymer-modified grout is cement-based grout with polymer additives that improve flexibility, adhesion, and water resistance. It falls between standard cement grout and epoxy in performance and price, making it a practical choice for most bathroom and laundry-floor applications.
Grout Type | Water Resistance | Durability | Sealing Required | Relative Cost |
Cement-based (sanded) | Low to moderate | Moderate | Yes | $$ |
Cement-based (unsanded) | Low to moderate | Moderate | Yes | $$$ |
Polymer-modified | Moderate to high | High | Optional | $$$ |
Epoxy | Very high | Very high | No | $$$ |
For shower floors and other wet areas, epoxy or polymer-modified grout is worth the additional investment. For low-traffic dry areas with large-format tiles, standard sanded cement grout with a sealant applied afterwards is adequate.
Tool | Purpose |
Oscillating multi-tool with grout blade | Power removal of old grout from joints |
Grout saw (manual) | Hand removal in tight or fragile areas |
Utility knife | Cleaning out corners and fine details |
Shop vacuum | Removing grout dust and debris between steps |
Grout float | Pressing and spreading new grout into joints |
Grout sponge | Cleaning excess grout from the tile surface |
Bucket | Mixing water and rinsing the sponge |
Soft cloth or buffer pad | Removing grout haze after curing |
Drop cloths | Protecting adjacent surfaces from dust and splatter |
Dust mask (P2 rated) | Protecting lungs from silica dust during removal |
Eye protection | Preventing grout fragments from entering the eyes |
Grout dust during removal contains silica particles, which are hazardous if inhaled. A P2-rated dust mask is the minimum protection recommended. An oscillating multi-tool with a vacuum attachment significantly reduces airborne dust compared to hand-only methods.
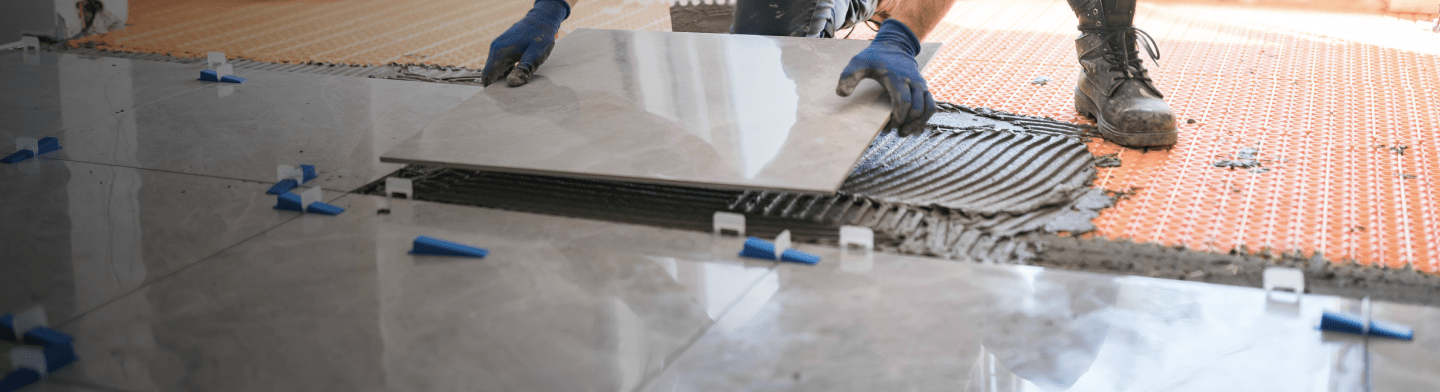
The process is divided into three phases: preparation, removal, and application. Each phase must be completed in full before moving to the next. Rushing any stage compromises the result.
All furniture and floor coverings adjacent to the tiled area are removed. Drop cloths are placed over any nearby fixed surfaces. If working in a room connected to others, thin plastic sheeting can be hung at doorways to contain grout dust. The existing grout lines are inspected carefully. Any cracked, hollow, or loose tiles are noted; they must be repaired or replaced before regrouting can begin. Attempting to regrout over an unstable tile will not hold.
The oscillating multi-tool with a grout-removal blade is set to work along each joint, with the blade held perpendicular to the tile surface. The tool is moved steadily along the joint. Pressure against the tile face is avoided; the blade should stay in the joint, not ride up onto the tile.
The goal is to remove grout to a depth of approximately 3 to 5 mm. Full removal to the base is not always necessary, but the joint must be clear enough for fresh grout to bond to a clean surface. A shop vacuum is used frequently during this step to remove debris before it settles. This keeps the workspace cleaner and prevents fine particles from being ground back into the joints.
For tile edges, corners, and areas too tight for the power tool, a utility knife or manual grout saw is used. A note on regrouting over existing grout: applying new grout directly over old grout without removing the old material is not a reliable long-term repair. New grout does not bond consistently to old grout. In wet areas, any mould present in the old grout will continue to grow beneath the new layer. Full removal is the correct approach for a lasting result.
After removal, each joint is inspected for remaining grout fragments, dust, and debris. A second vacuum pass is made over the entire area. Any stubborn pieces are scraped out with the utility knife.
The tile surface is then wiped down with a dry cloth to remove surface dust. The joints must be as clean and free of particles as possible before new grout is applied. Dust or debris in the joint will prevent proper adhesion.
Powdered grout is measured into a bucket, and water is added gradually according to the manufacturer’s ratio instructions. The mix is worked until a smooth, lump-free consistency is achieved, similar in texture to peanut butter or a firm paste. The mix should hold its shape while remaining workable.
Epoxy grout is mixed from two components (resin and hardener) per the product instructions. Epoxy sets faster than cement-based grout, so a smaller batch is mixed at a time to maintain workability. Grout should be mixed in small to medium quantities that can be applied within the product’s working time, typically 20 to 30 minutes for cement-based grout and less for epoxy formulations.
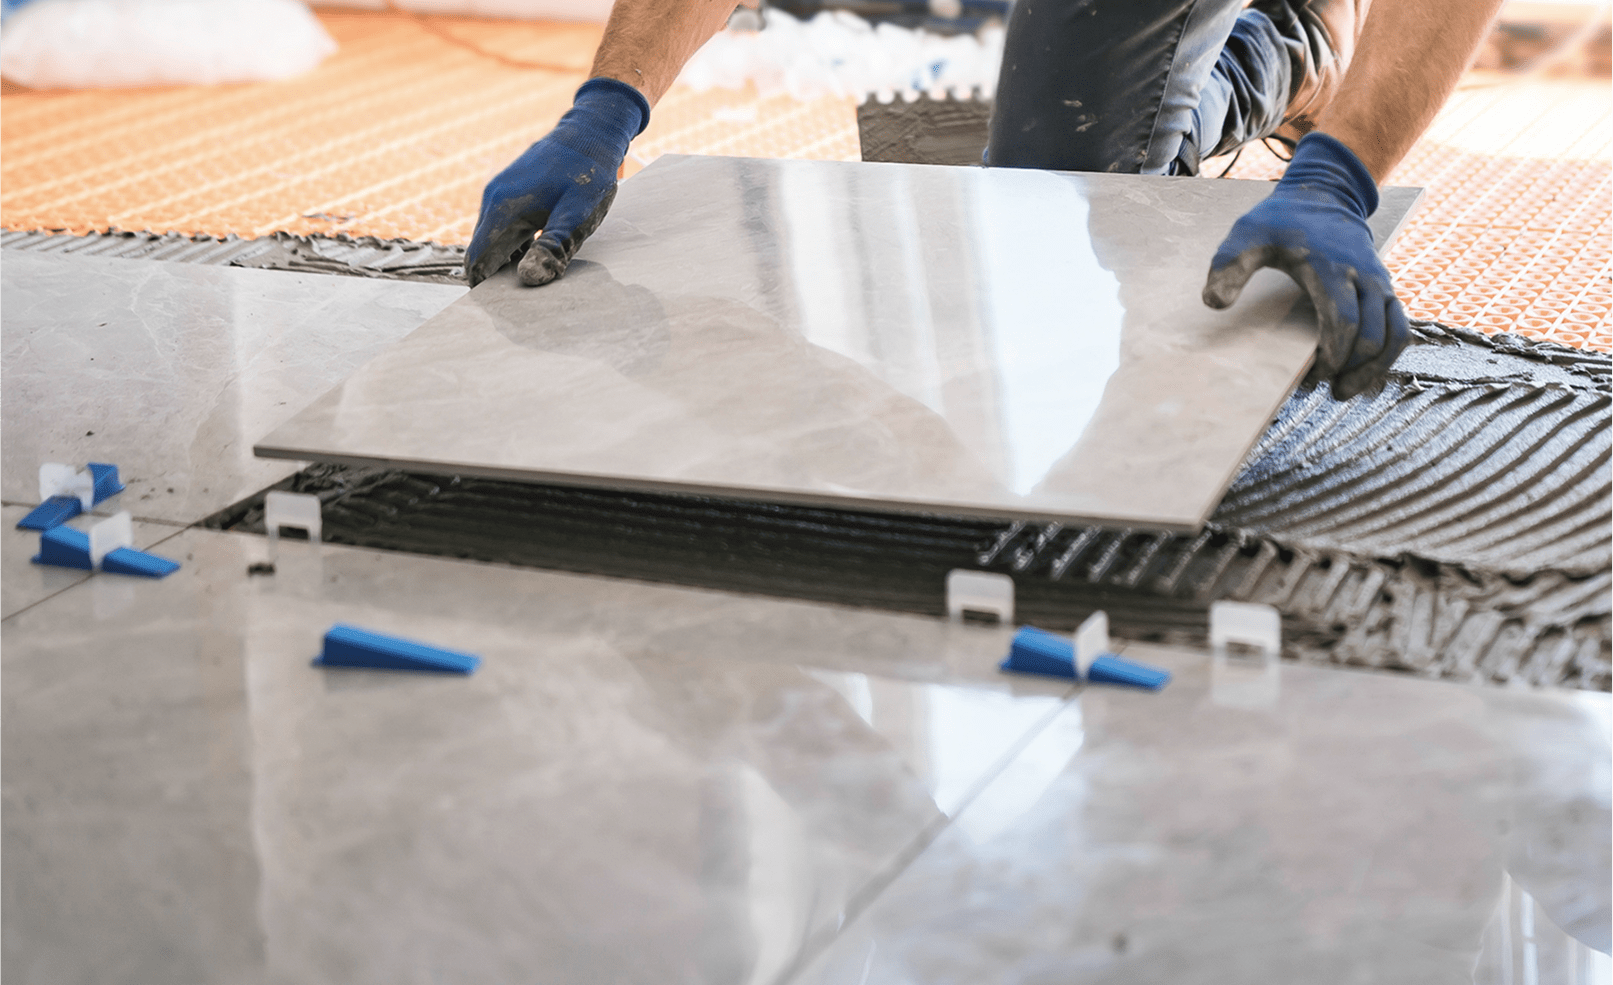
The grout float is loaded with grout and pressed diagonally across the joints at approximately 45 degrees to the tile surface. Working at an angle (rather than parallel to the joints) ensures the grout is pushed fully into the joint rather than dragged along the top.
Each joint is worked in sections, pressing the grout in firmly and checking that no voids or air pockets remain. The float is swept diagonally across the tiles to pack the joints and sweep away surface excess simultaneously.Particular attention is paid to corners and edges, where the float may not reach easily. These are hand-worked using a finger or a small tool to ensure complete filling.
After the grout has been applied, a damp (not wet) sponge is used to wipe the tile surface in a single direction. The sponge is rinsed frequently. Too much water at this stage can draw grout out of the joints, creating a weaker finish.
The goal at this stage is to remove the bulk of the surface grout without disturbing what is in the joints. A perfectly clean surface is not expected, yet a light film will remain. The sponge’s water is changed regularly. Dirty water smeared back over freshly grouted joints deposits a residue that is harder to remove once dry.
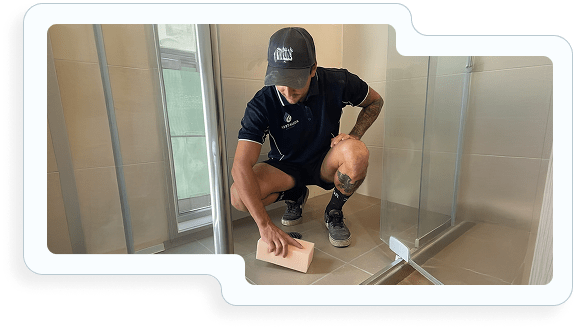
Once the grout has cured, typically after 24 hours for cement-based grout and longer for epoxy, a light haze will be visible on the tile surface. This is buffed away with a soft, dry cloth or a dedicated grout haze remover product. For polished porcelain or stone tiles, extra care is taken at this stage to avoid scratching the tile surface.
Once the grout is fully cured and the haze has been removed, a grout sealer is applied to all cement-based joints in wet areas. Sealer is worked into the joints using a small brush or applicator bottle, allowed to penetrate according to the product’s dwell time, and then wiped clean from the tile surface.
Epoxy grout does not require sealing, as the material is non-porous by nature. Sealing is particularly important in shower floors, bathroom wet areas, and laundry floors where grout is in regular contact with moisture.
Cost varies based on the size of the area, the type of grout used, the condition of the existing tiles, and whether the work is done as a DIY project or by a professional.
Item | Approximate Cost |
Grout (cement-based, standard bag) | $15 to $40 |
Grout (epoxy, professional formulation) | $60 to $120 |
Grout sealer (bottle) | $25 to $60 |
Oscillating multi-tool (if not owned) | $80 to $200 |
Grout float, sponge, and accessories | $20 to $50 |
Dust mask (P2, pack of 5) | $10 to $20 |
A DIY regrout of a standard bathroom floor (approximately 4 square metres) using cement-based grout and hiring or owning tools would typically cost $80 to $200 in materials. A bathroom shower floor using epoxy grout would sit higher.
For professional regrouting services, labour accounts for 60 to 80 percent of the total cost. The most significant variables are floor area and grout type.
Area Size | Cement-Based Grout | Epoxy Grout |
Small bathroom floor (up to 4 sqm) | $300 to $600 | $500 to $900 |
Medium bathroom or laundry floor (4 to 8 sqm) | $550 to $1,000 | $850 to $1,500 |
Kitchen floor (8 to 15 sqm) | $900 to $1,800 | $1,400 to $2,500 |
Large floor area (15 sqm and above) | Price on assessment | Price on assessment |
These figures are general guides. The actual cost for your project will depend on your location, whether tile repairs are needed beforehand, access difficulty, and the specific grout product selected.
When a tiling professional is engaged, the quoted price typically includes:
The labour component rises when tiles need to be repaired or replaced before regrouting can proceed, which is a consideration for older floors where some tiles may already be loose or cracked.
Several errors are repeatedly seen in DIY regrouting attempts that lead to premature failure of the new grout.
Unsanded grout placed in joints wider than 3 mm can crack as it cures due to shrinkage. Sanded grout used on polished stone tiles scratches the surface. Cement grout used in a shower floor without subsequent sealing absorbs moisture and fails quickly. Matching grout type to joint width and exposure is the first decision that determines the quality of the outcome.
Grout applied over existing grout does not bond to the old material reliably. In wet areas, especially, it eventually separates, and the old problems, including mould, continue underneath. Full removal before reapplication is the correct process for a lasting repair.
Grout that is too wet will shrink excessively as it cures, leading to cracks and weak joints. Grout that is too dry will not work into the joints properly and can crumble. The manufacturer’s water-to-powder ratio is the guide to follow, and the consistency should be checked before application begins.
Wiping the tiles too soon after application pulls grout from the joints. Using too much water in the cleaning sponge dilutes the surface grout, weakening the joint. Light, controlled cleaning with a barely damp sponge in a single direction is the correct approach.
Spreading grout parallel to the joints (rather than at 45 degrees to the surface) drags material along the top of the joint instead of pressing it in. Air pockets and incomplete fill are the result. The diagonal spread with a float is the technique that ensures full joint penetration.
In wet areas, cemented grout that is not sealed after curing begins absorbing moisture immediately. Staining, mould, and early deterioration follow. Sealing is a short additional step that significantly extends the lifespan of the new grout.
Both options are valid depending on the scope of the project and the condition of the tiles involved. The honest comparison looks like this:
If moisture has already penetrated the substrate and the grout failure is symptomatic of a deeper waterproofing issue, regrouting alone will not solve the problem. In that situation, the first step is to determine exactly where water is entering and how far it has travelled before any surface repair is attempted.
For Brisbane properties, leak detection is carried out to identify the source without damaging walls or floors. Where the investigation confirms that waterproofing has broken down beyond the grout joints, compliant waterproofing and re-tiling address the root cause rather than the surface symptom.
Once fresh grout is applied and cured, regular maintenance extends its lifespan significantly and delays the next regrouting cycle.
Proactive maintenance is significantly cheaper than waiting for grout to fail and dealing with subfloor or waterproofing repairs as a consequence.
Regrouting floor tiles is one of the most practical ways to extend the life of a tiled surface without the cost and disruption of a full replacement. When grout begins to crack, stain, or fail, acting early prevents moisture from reaching the substrate and avoids far more expensive structural repairs.
Small, low-risk areas can be handled as a DIY project. However, regrouting jobs in bathrooms, showers, and high-moisture environments require precision, the right materials, and experience with the process. Improper grout removal, incorrect mixing, or poor application leads to premature failure and ongoing water damage repairs that cost considerably more than the original job.
Where signs of grout deterioration are present or where a long-lasting professional finish is the goal, an expert assessment is the practical starting point. Aquatech Grouting specialises in floor tile regrouting, leak detection, and waterproofing for Australian conditions.
Whether the project is a small bathroom refresh or a full regrouting of multiple wet areas, get a free inspection. Aquatech Grouting offers free on-site assessments for Brisbane properties. If your floor tile grout is cracking, staining, or showing mould that keeps returning, contact the team to have the area assessed and get a clear recommendation before any work is committed to.
New grout does not bond reliably to old grout. In dry areas with minor surface deterioration, a grout pen or colourant can be applied as a cosmetic fix. For any wet area or where the existing grout is crumbling or mould-affected, full removal and replacement is the correct approach. Covering old grout traps existing problems and shortens the lifespan of the new grout significantly.
A standard bathroom floor of 4 to 6 square metres typically takes four to six hours to remove old grout and prepare the surface, followed by two to three hours for grout application and initial cleaning. Grout requires at least 24 hours to cure before the area is used with water and 72 hours for a full cure before the sealer is applied. The full process from start to usable finish is generally between two and three days.
Sanded grout contains fine sand aggregate. It is used in joints wider than 3 mm and provides greater structural stability in wider gaps. Unsanded grout is used in joints narrower than 3 mm and is suitable for polished stone and glass tiles where sand particles would scratch the surface. Using the wrong type for joint width is one of the most common causes of grout cracking after installation.
Cement-based grout in wet areas should be sealed after curing. Without a sealer, it absorbs water and stains readily, leading to discolouration and mould growth. Sealing is carried out with a penetrating silicone-based product and should be renewed annually. Epoxy grout does not require sealing, as it is non-porous by composition.
For a small bathroom floor of around 3 to 4 square metres, professional regrouting in Australia typically falls between $300 and $700 for standard cement-based grout. Epoxy grout applications and larger areas cost more. Labour accounts for the majority of the cost. Geographic location, tile type, and whether repair work is included all affect the final figure.
Yes. Because old grout is fully removed before new grout is applied, the colour of the replacement grout can be any available shade. This is used to refresh the appearance of older floors or to match a change in bathroom decor. Colour consistency across the floor depends on the grout being properly mixed to the same ratio throughout.
If tiles are lifting, if there is a hollow sound when tiles are tapped, or if moisture is appearing in unexpected places, such as walls adjacent to a tiled shower floor, the cause may be waterproofing failure rather than just grout failure. In this case, regrouting the surface does not resolve the underlying issue. Investigation of the substrate and waterproof membrane is required before any surface repair makes sense.
Regrouting is appropriate when the tiles themselves are structurally sound, and the primary failure is in the grout joints. Tile replacement becomes necessary when:
A professional assessment quickly identifies which situation applies. For Brisbane homeowners and property managers dealing with shower floors, bathroom floors, or any tiled wet area, Aquatech Grouting carries out free assessments and provides a clear recommendation based on what they find, rather than defaulting to the more expensive option.