Are you thinking about grouting your bathroom, kitchen, and balcony tiles yourself? You’re in the right place. Whether you’re renovating your home or fixing up a property, getting your tile grouting right is absolutely critical for preventing water damage and keeping mould at bay, something we Aussies know all too well with our humid climate.
In this detailed guide, we’ll walk you through everything you need to know about grouting tiles in homes: understanding different grout types suited to our climate, essential tools you can grab from Bunnings, a step-by-step DIY grouting process, common mistakes that lead to expensive repairs, and when it’s smarter to call in the professionals.
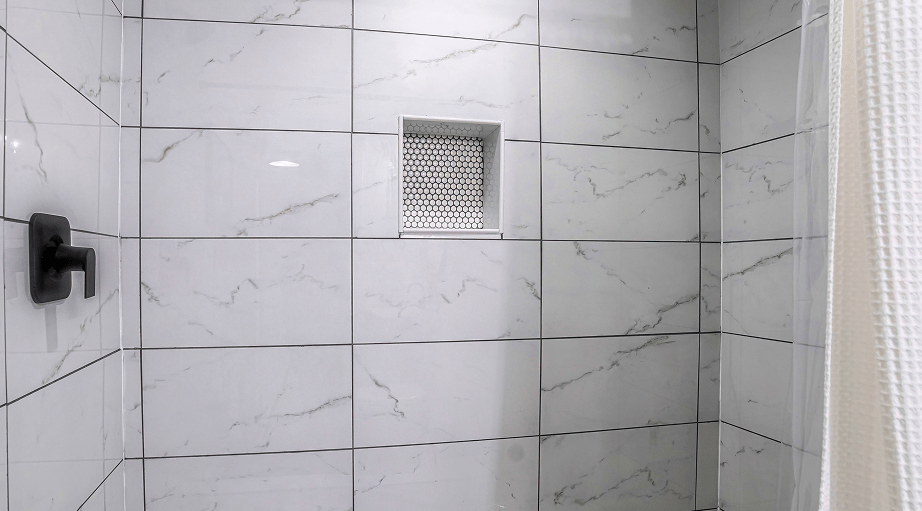
Tile grout is the material that fills the spaces between tiles, creating a watertight seal that prevents moisture from seeping through to the substrate beneath. Think of it as the unsung hero of your bathroom, kitchen, or outdoor tiled areas.
Grouting is the initial application when tiles are first laid, while regrouting involves removing old, damaged grout and replacing it with fresh material. You’ll know regrouting is necessary when you see cracking, persistent mould growth, discolouration, or crumbling grout.
The humid coastal climate and wet seasons create unique challenges. Higher mould and mildew risk, faster grout deterioration in bathrooms, salt air damage in coastal properties, and the critical importance of mould-resistant grout types make choosing the right approach essential for homes.
Not all grout is created equal, especially when you’re dealing with Brisbane’s humidity or Gold Coast’s salt air. Here’s what you need to know.
Grout Type | Best For | Lifespan |
Sanded Cementitious | Floor tiles, gaps >3mm | 5-10 years |
Unsanded Cementitious | Wall tiles, gaps <3mm | 5-10 years |
Epoxy Grout | Showers, wet areas, commercial | 15-20 years |
Furan Resin | Industrial, chemical exposure | 20+ years |
The most common DIY option, cementitious grout, is composed of Portland cement, sand (in the sanded version), and colour pigments. You mix the powder with water and apply it while it’s still workable. Curing time is typically 24-72 hours, though this extends in humid weather. When to use it:
Australian considerations: Requires sealing in humid climates like the Gold Coast, Brisbane, and Sunshine Coast. Annual resealing is recommended for bathrooms, and mould can develop without proper ventilation.
Epoxy grout is a two-part system made from epoxy resins and hardener. It cures in about 24 hours and is less affected by humidity than cementitious grout. When to use it:
Why Aquatech Grouting recommends epoxy: At Aquatech Grouting, we exclusively use epoxy grout for shower regrouting because it resists mould and mildew growth, doesn’t require sealing, lasts three times longer in wet conditions, and provides superior waterproofing.
DIY Reality Check: Epoxy grout is tricky to work with for DIYers. It has a short working time (30-45 minutes), requires experience to apply smoothly, is difficult to clean if it sets on tile surfaces, and professional application is recommended for showers.
Before you start, make sure you’ve got the right tools. Here’s what you can pick up from Bunnings or Mitre 10.
Tool | Purpose | Approx. Cost (AUD) |
Grout Float | Applying grout to joints | $15-30 |
Rubber Gloves | Hand protection | $5-10 |
Large Sponge | Cleaning excess grout | $5-15 |
Buckets (2) | Clean + dirty water | $10-20 |
Grout Rake/Removal Tool | Removing old grout (regrouting) | $15-25 |
Mixing Drill & Paddle | Mixing grout | $50-100 |
Margin Trowel | Scooping grout | $10-20 |
Caulking Gun | Sealing corners | $10-15 |
Grout Sealer & Applicator | Protecting cementitious grout | $20-40 |
Safety Glasses | Eye protection | $10-15 |
Knee Pads | Floor work comfort | $15-30 |
Where to buy in Australia: Bunnings Warehouse has the widest DIY selection with helpful staff; Mitre 10 offers a good range with often better pricing; tile shops stock professional-grade products with expert advice; and specialist suppliers carry epoxy grout and waterproofing membranes.
Cost Reality Check: DIY basic grouting will set you back AUD $50-AUD $150 for tools and materials, while professional grouting typically costs AUD $300- AUD $800, depending on the area. When the cost difference is small, professional quality is often worth it.
Right, let’s get stuck into it. This process works for most DIY grouting projects, but remember: showers and wet areas require extra waterproofing steps that might need a professional’s touch.
Timeline: Allow 1-2 hours
Don’t skip this. Preparation is 50% of grouting success. If regrouting, remove old grout:
Clean the tile surface:
Inspect for damage:
Australian Climate Tip: In humid weather around Brisbane and the Gold Coast, use a fan or dehumidifier to ensure tiles are bone-dry before grouting. Moisture trapped beneath grout leads to mould and adhesion failure.
Common Mistake #1: Grouting over damp surfaces
Result: Discoloured grout, poor adhesion, premature failure
Timeline: 10-15 minutes
For cementitious grout (powder):
Batch Size: Mix only what you can use in 30 minutes. Aussie heat accelerates drying, so work smart!
Australian Weather Considerations:
For Epoxy Grout: We don’t recommend DIY epoxy mixing unless you’re experienced with epoxy. Incorrect ratios ruin the entire batch.
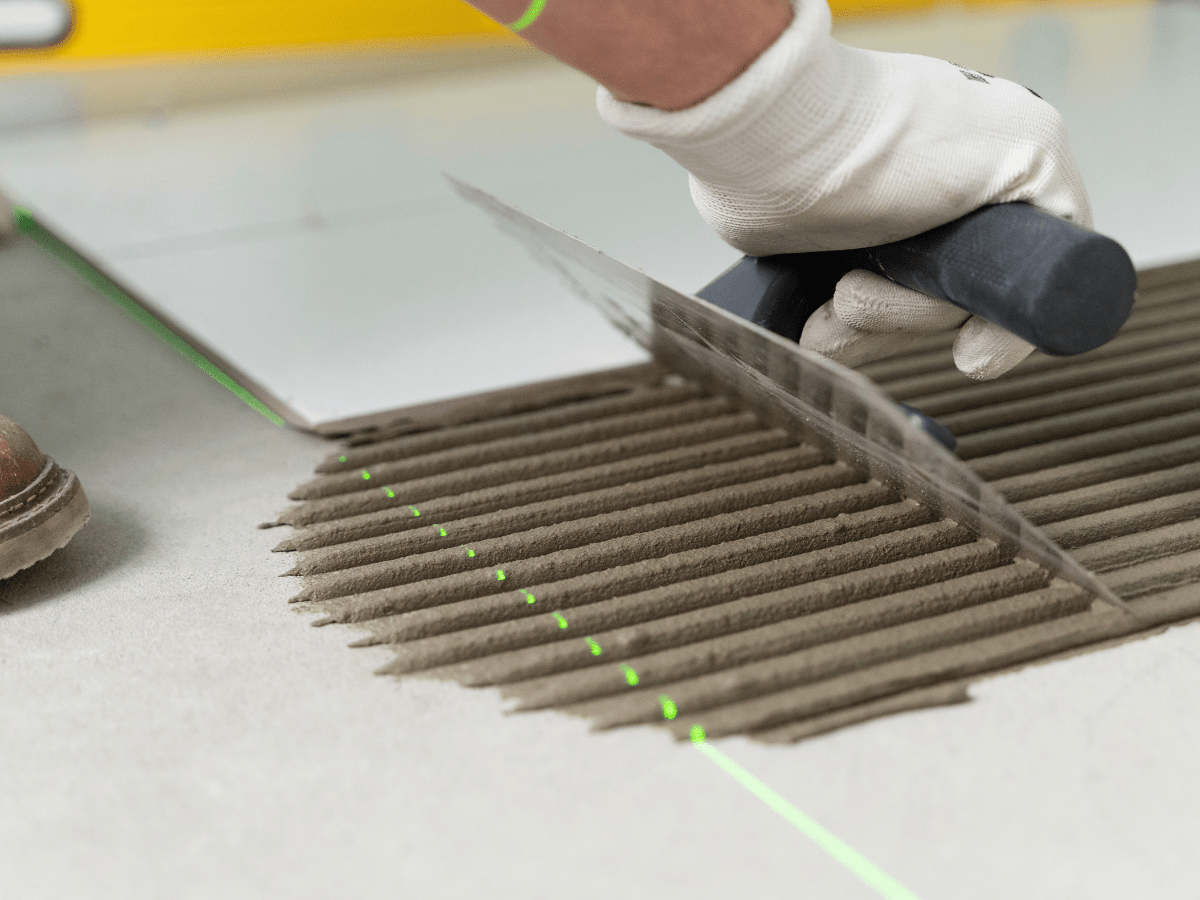
Timeline: 1-3 hours (depending on area)
Now for the main event!
Visual Cue: Joints should be filled, level with or slightly below the tile surface.
Technique Tips:
Common Mistake #2: Applying grout too thin or with gaps
Result: Water infiltration, tile movement, premature failure
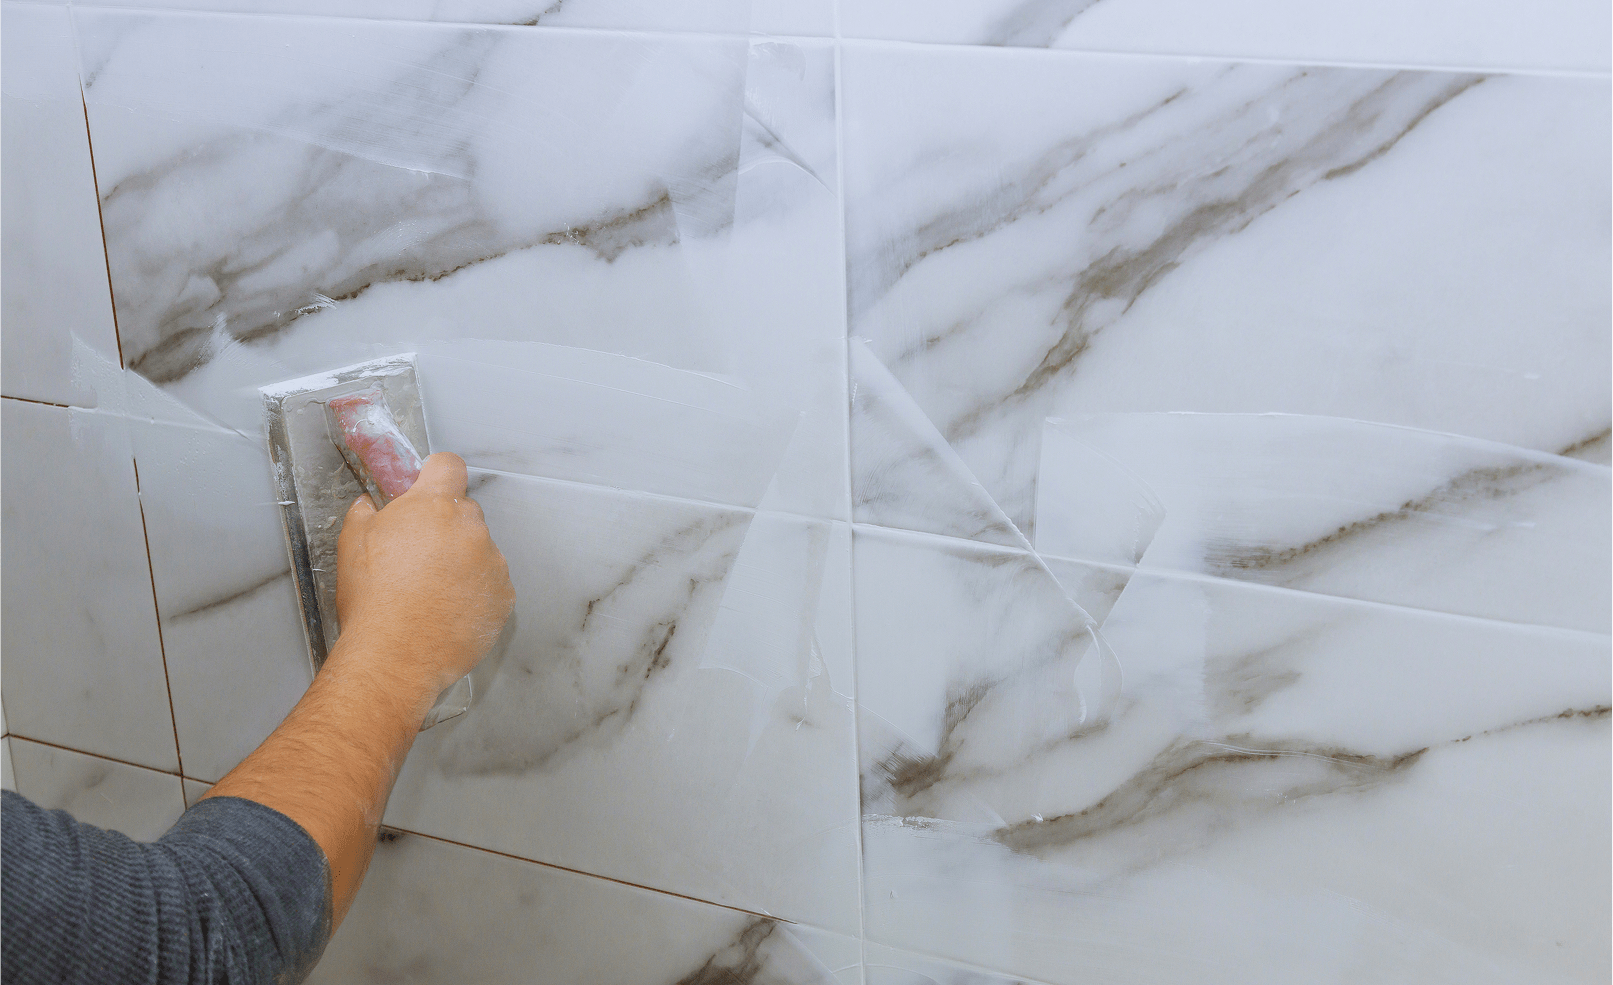
Timeline: 30-60 minutes. This is where patience pays off.
Critical Timing: Start cleaning when grout is “thumbprint firm” (10-30 minutes after application)
First Pass (Damp Sponge):
Second Pass (After 15-20 minutes):
Final Pass (When grout is hazy but firm):
Australian Humidity Tip: High humidity slows drying. Use fans to accelerate, but don’t dry too quickly, or the grout may crack.
Common Mistake #3: Too much water during cleanup
Result: Weakened grout surface, discolouration, pitting
Timeline: 24-72+ hours
Patience is your best mate during this phase.
Curing Timeline (Australian Climate):
Climate Condition | Curing Time | Foot Traffic | Sealing Time |
Dry, warm | 24 hours | 24 hours | 48-72 hours |
Humid, cool | 48-72 hours | 48 hours | 5-7 days |
Wet areas | 72 hours | 72 hours | 7-10 days |
During Curing:
Sealing Cementitious Grout:
Sealing is crucial for preventing staining, reducing water absorption, inhibiting mould growth, and extending grout life.
Application:
Re-sealing Schedule (Australian Climate):
Epoxy Grout: No sealing needed, one reason professionals prefer it!
Silicone Sealant for Change-of-Plane Joints:
Critical locations include wall-to-floor corners, shower base edges, benchtop-to-wall joins, and around fixtures.
Why silicone instead of grout? It allows movement and expansion, provides better waterproofing, and prevents cracking.
Application:
Final Inspection Checklist:
We see these mistakes constantly when we’re called in to fix dodgy DIY grouting jobs. Learn from others’ failures.
Finished your grouting job? Here’s how to assess whether you’ve nailed it or if there are issues to address.
Quality Indicator | What to Look For | Pass/Fail |
Coverage | No gaps, voids, or holes in joints | All joints 100% filled |
Consistency | Even colour throughout | No light/dark patches |
Surface Level | Grout slightly below the tile surface | Smooth, uniform depth |
Cleanliness | No haze or residue on tiles | Crystal clear |
Corners | Silicone (not grout) at the change-of-plane | Smooth silicone beads |
Straightness | Grout lines follow tile edges | Clean, defined lines |
How to perform (after full curing):
Interpretation:
Immediate professional assessment needed:
Reality check: If you’re seeing these signs, the issue might be deeper than the grout itself. Waterproofing failure, substrate problems, or tile movement often require professional diagnosis.
Get a professional assessment from Aquatech Grouting, and we’ll tell you straight if it’s an easy fix or a bigger issue.
You’ve done the hard yards getting your grouting right. Now let’s keep it that way!
Frequency | Task | Method | Time Required |
Daily | Wipe down after use | Squeegee shower walls | 30 seconds |
Weekly | General clean | pH-neutral cleaner, soft brush | 10-15 mins |
Monthly | Deep clean | Grout-specific cleaner | 30-45 mins |
Annually | Re-seal (cementitious) | Grout sealer application | 1-2 hours |
Every 5-7 years | Professional regrout | – | – |
Bicarb Soda + Water Paste:
White Vinegar Solution:
Warning: Don’t use vinegar on marble or natural stone tiles (acidic damage)
For Mould & Mildew (Common in Aussie Bathrooms): Bicarb & Vinegar Combo:
Hydrogen Peroxide (3%):
Tea Tree Oil (Natural Mould Killer):
High-Risk Areas (Brisbane, Gold Coast, Sunshine Coast):
Prevention Strategies:
When mould keeps coming back: This might indicate failed waterproofing or poor substrate prep. Professional inspection recommended: Leak detection service.
Even the best grouting jobs can develop issues over time (especially in our climate). Here’s how to diagnose and decide: DIY fix or call the experts?
Quick assessment:
Surface Mould Treatment:
Red flags requiring professional intervention:
Reality check: Recurring mould often indicates water getting behind tiles, a waterproofing membrane failure. This requires professional waterproofing repair, not just regrouting.
Look, we’re grouting professionals, and yeah, we’d love your business. But we respect the DIY spirit; there’s satisfaction in doing it yourself. That said, there are situations where calling in experts saves you time, money, and a heap of frustration.
Go for it yourself when:
Call the experts when:
Shower Regrouting & Wet Areas:
Why professionals for showers?
Typical DIY Costs:
Professional Costs (Aquatech indicative):
Real-world scenario: DIY shower regrouting: $150 materials + 12 hours work = possible redo in 2-3 years
Professional shower regrouting: $900 + zero hassle = 15+ years durability
Cost per year:
Kitchen backsplash or bathroom wall tiles?
Shower floor or wet area?
Existing grout failing or mould recurring?
Commercial or large residential?
Professional-Grade Materials:
Expertise:
You now have all the knowledge you need to tackle a DIY grouting project successfully! Remember these key takeaways:
For shower regrouting, leak detection, or when your DIY project reveals bigger issues, Aquatech Grouting is here to help.
Our Services:
Get a Free Assessment: Contact us today
Service Areas: Brisbane | Gold Coast | Sunshine Coast
Good luck with your grouting project, and remember, if it’s a shower, give us a call. Your future self will thank you.
Curing time varies with humidity levels. In typical Brisbane conditions: Touch-dry takes 24-48 hours, foot traffic is safe after 48-72 hours, water exposure should wait 72+ hours, and sealing should be done after 7-10 days for complete drying. Epoxy grout cures faster and is less affected by humidity (24 hours).
Darker grout (medium to charcoal grey) hides dirt and staining better than white grout. However, proper sealing matters more than colour for longevity. For coastal areas, ensure grout is salt-resistant.
Only if existing grout is solid and you’re adding minimal thickness. Better practice is removing old grout to 5-10 mm for proper adhesion. For wet areas, always remove old grout completely.
For showers, pools, and commercial kitchens, absolutely. Epoxy costs 3-4x more but lasts 3x longer, never needs sealing, resists mould, and prevents water penetration. For dry areas with light use, cementitious grout is adequate.
With quality epoxy grout: 15-20+ years. With sealed cementitious grout: 5-7 years. With unsealed cementitious: 2-3 years. Signs it’s time: cracking, mould, water stains, grout crumbling.
No! This is one of epoxy’s main advantages – it’s non-porous and doesn’t require sealing.
Seal all cementitious grout, improve ventilation (exhaust fans), squeegee shower walls daily, keep humidity below 60%, use epoxy grout in wet areas, and clean regularly with anti-mould solutions. Recurring mould often indicates waterproofing issues.
NO. Grout is NOT waterproofing. You need a proper waterproof membrane beneath tiles (per AS 3740). Grout is the surface seal; membrane is the true waterproof barrier.