

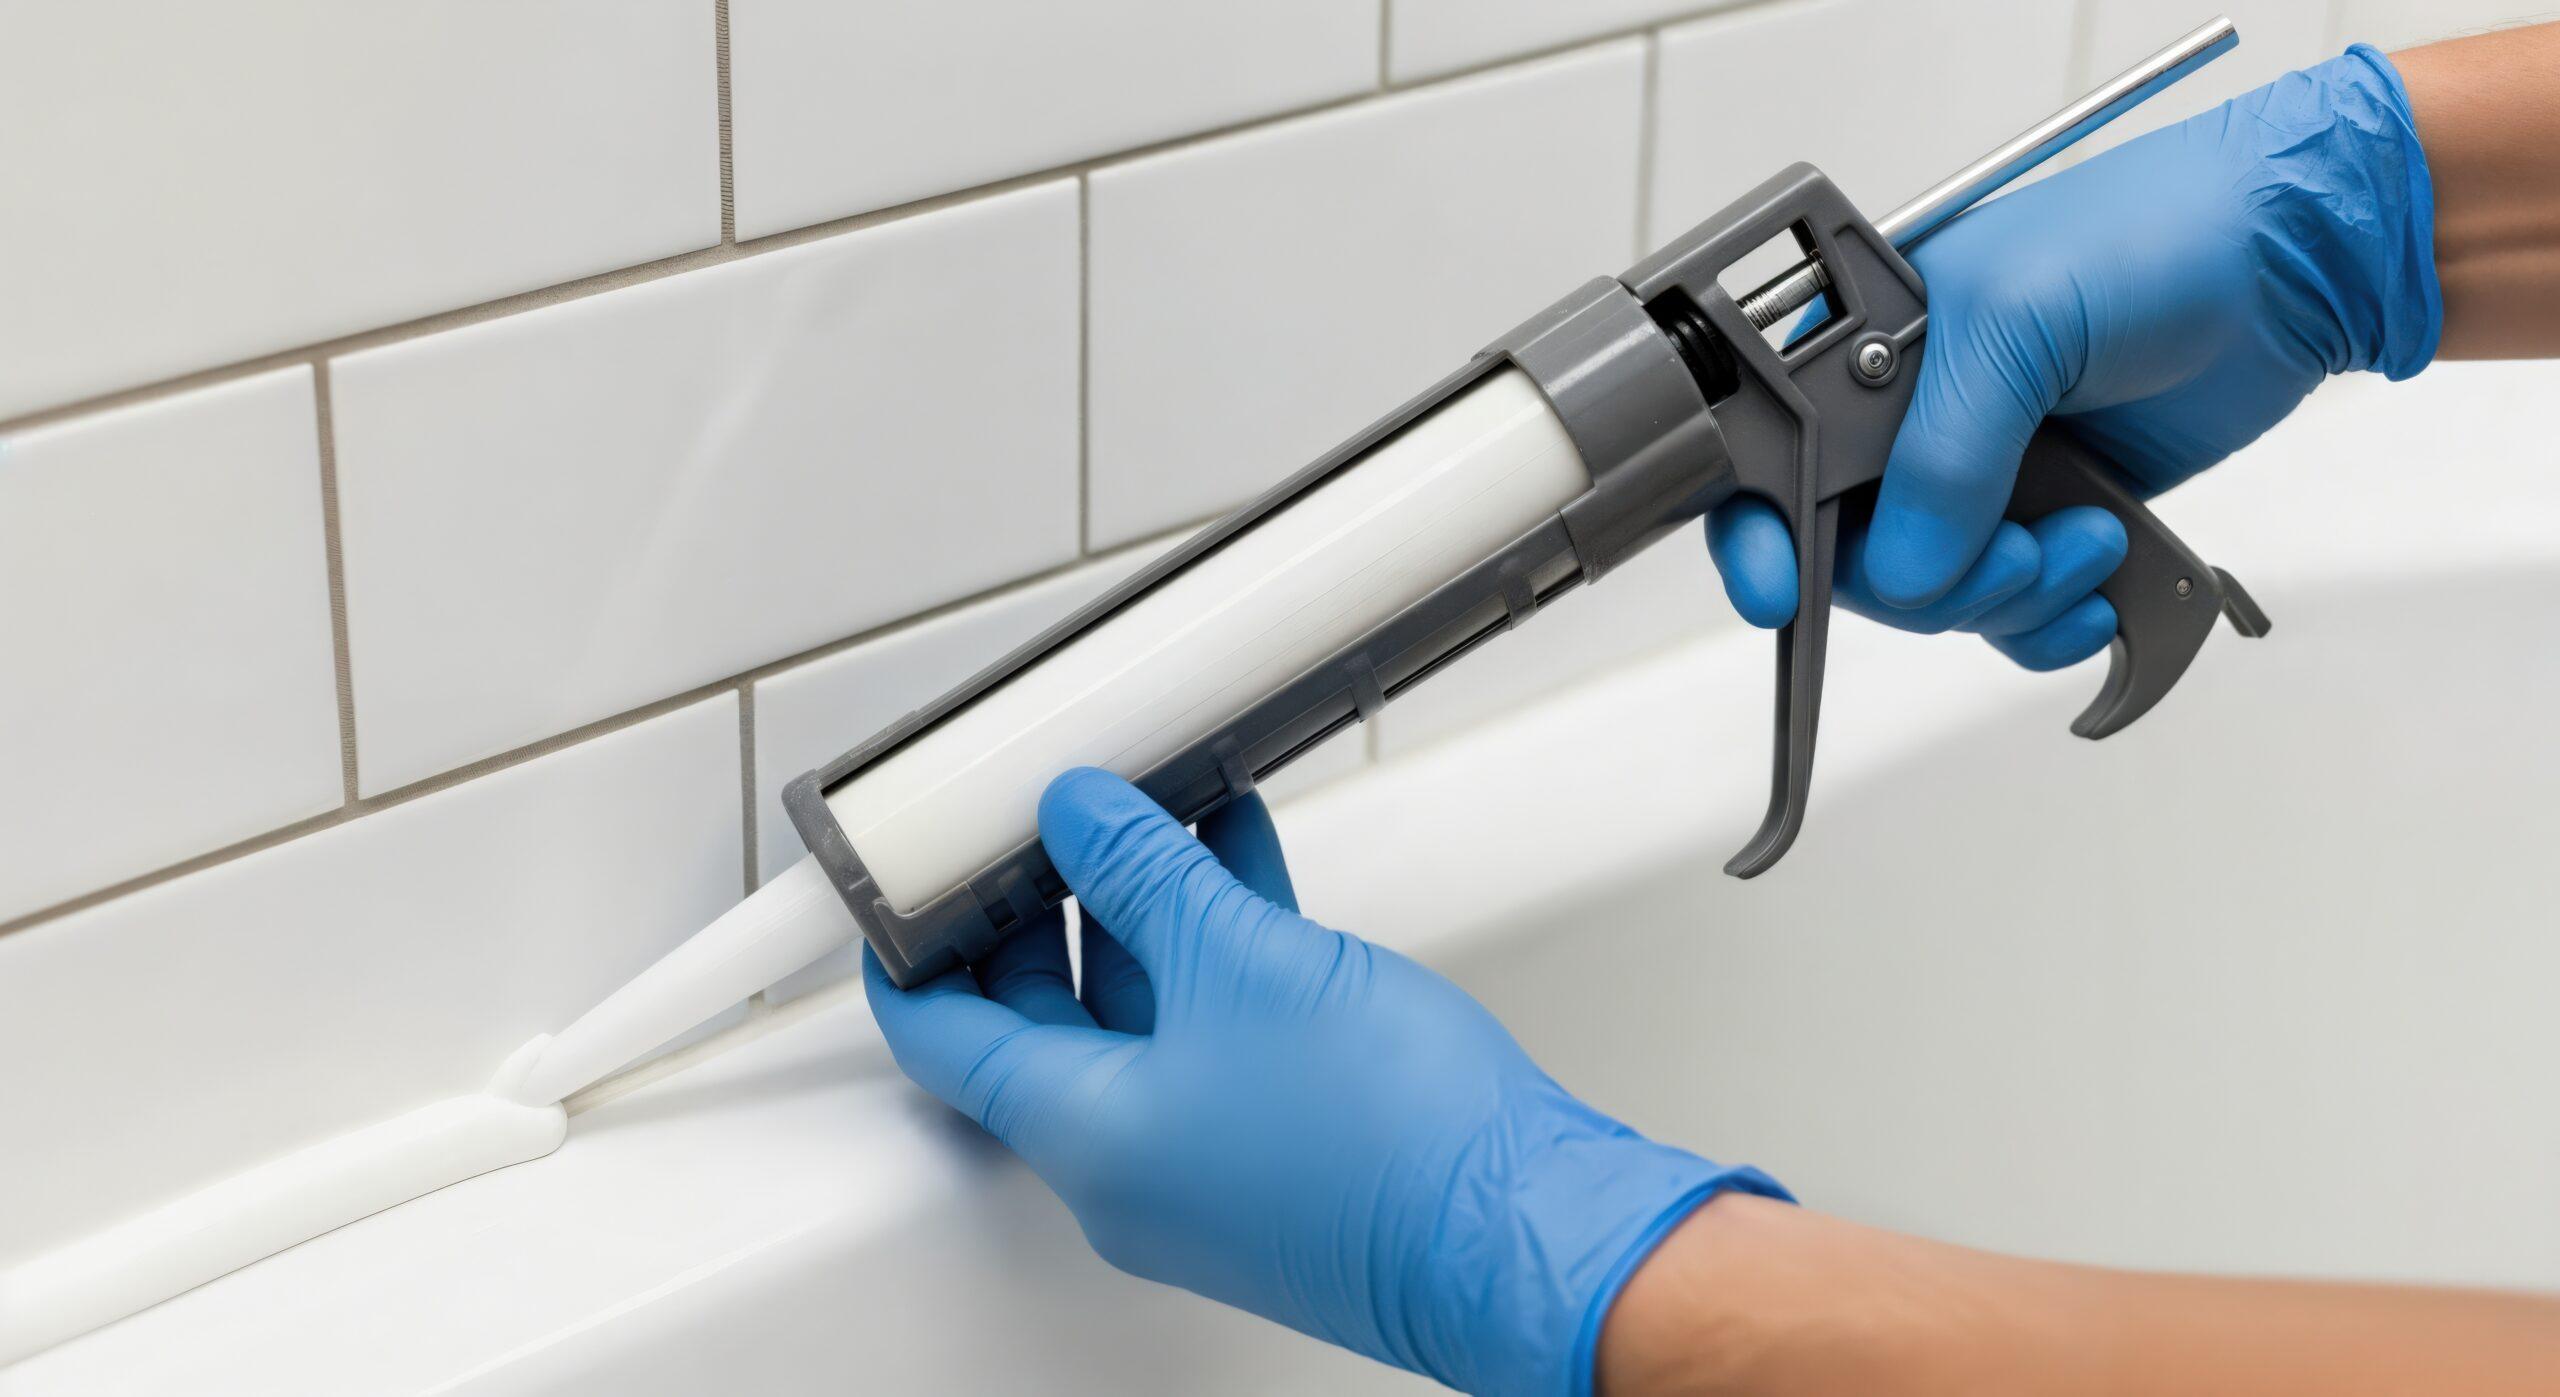
Shower silicone is one of those things most people only think about once something goes wrong. The joint looks fine until it is not. Then it is black with mould, pulling away from the tile, or crumbling at the corners. By that point, water has often been seeping behind the surface for longer than anyone realises.
This guide covers everything about shower silicone: what it is, how to apply it correctly, where it needs to go, and when to call someone who does this every day rather than attempting it yourself. If you are in Brisbane, the Gold Coast, or the Sunshine Coast, the local climate conditions matter more than you might think, and this guide accounts for them.
Whether you are here because your silicone is mouldy, because you are doing a bathroom renovation, or because you have just installed a new shower screen and need to seal it, read this before you reach for a caulking gun.
Shower silicone is a waterproof sealant used to prevent water from entering gaps around showers, tiles, and fixtures. It can fail due to moisture, mould, poor application, movement, ageing, or improper surface preparation.
Silicone sealant in a shower is not decorative. It is a structural waterproofing element.
Tiles and grout can handle the flat surfaces. But anywhere two surfaces meet at an angle or where different materials join floor to wall, wall to wall at a corner, glass to tile, or shower screen frame to tile, that junction moves. It moves when the building shifts, when hot and cold water cause thermal expansion, and when the substrate behind the tiles breathes moisture.
Grout is rigid. Rigid material applied to a moving joint cracks. That is why shower corners and floor-to-wall joints should never be grouted. They should always be sealed with flexible silicone. Silicone is the correct material for movement joints because it stretches and returns without breaking the waterproof seal.
When silicone fails at a shower joint, water finds its way behind the tile surface. Once that happens, you are dealing with a wet substrate, potential membrane damage, mould growth inside the wall cavity, and eventually structural timber or substrate deterioration.
Shower silicone has a service life. Even the best products eventually fail under the conditions inside a shower which are genuinely demanding.
The factors that shorten silicone lifespan in Australian bathrooms are:
Shower silicone comes in different types for specific applications, such as sealing shower joints, tiles, glass, and fixtures. Choosing the right silicone helps prevent leaks, mould, and premature failure.
There are two main silicone chemistries available for shower applications, and they behave differently.
Acetoxy cure silicone releases acetic acid as it cures. You will recognise it by the vinegar smell during application and drying. It cures relatively quickly, bonds well to glass, and is widely available at hardware stores. However, it is mildly corrosive and should not be used on natural stone tiles, marble, or travertine; the acid can stain or etch the surface.
Neutral cure silicone cures without releasing corrosive by-products. It has no vinegar smell. It is compatible with a wider range of materials, including natural stone, most metals, and sensitive substrates. It is the correct choice for high-end tiles, stone bathrooms, and anywhere you are uncertain about substrate compatibility.
For a standard tiled shower with ceramic or porcelain tiles, acetoxy or neutral cure both work. For a shower with stone tiles, always use a neutral cure.
Standard silicone will grow mould in a shower. Full stop. Showers are permanently damp, warm environments. If you use a general-purpose silicone in a shower, expect visible mould within 12 to 18 months.
Anti-mould silicone contains a fungicide blended into the formula. This does not make the silicone permanently mould-proof; nothing is, but it significantly slows mould growth and keeps the joint cleaner for longer. In Brisbane and South East Queensland, where humidity is consistently high, the difference is meaningful. Anti-mould shower silicone is not optional. It should be the baseline choice for any shower application.
The right colour depends on your grout and tile combination. Getting this wrong is one of the most common mistakes in DIY shower silicone jobs, and the result looks messy even if the application is technically correct.
Use clear silicone when your tiles have very light grout and you want the joint to disappear visually, or when you have a frameless shower screen where a colourless joint looks cleaner.
Use white silicone when your grout is white or near-white. White silicone is the most common choice in Australian bathrooms and blends well with most light-coloured tile palettes.
Use grey silicone when your grout is mid-grey to dark grey, or when you have dark tiles. Applying white silicone against dark grout creates a harsh contrast line that highlights the joint rather than hiding it.
Use black silicone in contemporary bathrooms with dark stone or charcoal-toned tiles, or along the base of matte black shower screen frames.
Silicone colour can affect both the look and finish of an Australian bathroom. Know when to use clear, white, grey, or coloured silicone to match tiles, fixtures, and overall bathroom design.
Grout Colour | Silicone to Use |
White or near-white | White or Clear |
Light grey | Light Grey or White |
Mid-grey | Grey |
Dark grey or charcoal | Dark grey or black |
Beige or off-white | Off-white or almond |
Natural stone veining | Clear neutral cure |
Before starting the silicone repair, gather the essential tools for removing old silicone, preparing the surface, applying the new sealant, and achieving a clean finish.
A caulking gun holds the silicone cartridge and controls the flow of material through the nozzle. There are three types, and the one you use affects your result.
The standard ratchet caulking gun is the most common type. Pulls the plunger forward with each trigger squeeze. Adequate for most DIY jobs. The main issue is that releasing the trigger does not stop the silicone from flowing; you need to push the pressure release tab to stop flow between runs.
The drip-free caulking gun has a mechanism that automatically releases pressure when you let go of the trigger. Prevents the excess flow that causes messy blobs at the start and end of each bead. Worth paying extra for if you want a cleaner result.
Manual squeeze tubes, some small silicone products come in squeeze tubes without a cartridge. These are difficult to control for long, consistent runs and are best for very small patch jobs only.
Every silicone cartridge comes with a plastic nozzle that you cut to create the opening.
Cut the nozzle at 45 degrees; this angle allows you to apply the silicone at a comfortable angle to the joint while pulling the gun towards you.
The size of the hole you cut determines the bead size. Cut smaller than you think you need. You can always open it up further, but a nozzle that is too large produces a bead wider than the joint and creates more cleanup work. For a standard 6mm to 8mm shower joint, cut the nozzle to approximately a 4mm opening; the silicone will spread to fill the joint when pressed with a wet finger.
Masking tape applied correctly produces the sharp, clean silicone lines that separate a professional-looking result from a messy one.
Apply masking tape on both sides of every joint before you apply silicone. The tape edges define your silicone line. Press the tape down firmly, especially at corners. Use a low-tack tape if applying against delicate grout or painted surfaces.
The critical timing, remove the tape while the silicone is still wet before it begins to skin. If you let the silicone dry before removing the tape, the tape will tear the silicone edge when pulled and leave a ragged line.
If there is old silicone in the joint that needs to come out first, you will need:
A utility knife or Stanley knife for scoring and cutting the old silicone bead free from the surfaces.
A silicone scraper or plastic scraper for lifting and peeling the old material. Use plastic on glass-metal blades to scratch glass surfaces.
Chemical silicone remover is a solvent applied to residual silicone after the bulk material is removed. It softens the remaining film so it can be wiped away. Isopropyl alcohol or dedicated silicone remover products work well. Allow full evaporation before applying new silicone.
A single-edge razor blade for tight spots on tiled surfaces where a plastic scraper cannot reach.
Old silicone removal is the step most DIYers rush, and it is the step that determines whether the new silicone lasts.
New silicone will not bond to old silicone. If you apply new silicone on top of old silicone without removing the old material, you are creating a fake seal that will peel away within months. All old silicone must be completely removed before new silicone is applied. Every trace of it.
Run a utility knife along both edges of the old silicone bead, one cut along the tile or grout edge, and one cut along the opposing surface. This frees the silicone from both adhesion surfaces.
Then grip an end of the old bead with your fingers or a pair of pliers and peel it away from the joint. With luck and a solid old bead, it will come away in one long strip. Often it comes away in sections with residue remaining on both surfaces.
After the bulk of the old silicone is removed, you will almost certainly have residue on the tile surfaces and inside the joint. Apply a silicone remover product or isopropyl alcohol to the residual material. Allow it to soak for the time recommended on the product label.
Then scrape the softened residue away using your plastic scraper or razor blade as appropriate for the surface material. Repeat until the joint is completely clean.
Wipe the joint and surrounding surfaces with a clean, dry cloth to remove all cleaning product, loosened silicone particles, dust, and any other contamination.
The joint must be completely dry before you apply new silicone. In Queensland’s humidity, this can take longer than expected. Run ventilation, use a fan if available, and allow at least two to four hours of drying time after cleaning, ideally longer. If the surfaces are not completely dry, the new silicone will not bond and will fail again within weeks.
This guide explains how to silicone a shower correctly, from preparing the surface and applying the sealant to smoothing the bead and allowing it to cure properly.
Clean, dry, and completely free of old silicone and any residue. This step has been covered in the section above. Do not skip it. Do not rush it. The preparation is what determines how long the job lasts.
Run masking tape along both sides of every joint you are going to silicone. Press the tape edges down firmly, especially into corners. The inner edge of the tape on each side defines your silicone line, so align it precisely with the edge of the joint, not on top of it.
At internal corners where two walls meet, mitre the tape into the corner carefully. Press into the 90-degree angle with your fingernail or a blunt tool.
Puncture the inner foil of the silicone cartridge using the spike built into the back of most caulking guns. Cut the nozzle at a 45-degree angle to the size appropriate for your joint. Load the cartridge into the gun and squeeze the trigger slowly until silicone just reaches the nozzle opening.
This is where technique makes the biggest difference.
Hold the caulking gun at approximately 45 degrees to the joint surface. Pull the gun towards you; do not push it away from you. Pulling the gun ensures the silicone is being laid into the joint ahead of the nozzle, not dragged across the top.
Apply consistent trigger pressure to maintain an even bead size. Move at a steady, controlled pace. Start at one end of a joint and work to the other end in a single pass without stopping if possible. Stopping and restarting in the middle of a joint creates overlap points that are difficult to smooth.
For long runs, work in sections of 400 mm to 600 mm, apply silicone, smooth, and move to the next section.
Immediately after applying the silicone, smooth it into the joint. Wet your finger with soapy water or plain water works too, and draw your finger along the bead in a single continuous stroke. The wet surface prevents the silicone from sticking to your skin and allows you to create a smooth, slightly concave profile.
A caulking smoothing tool creates the same result and is more consistent for long runs. These plastic tools are inexpensive and available at any hardware store.
Press firmly enough to push silicone into the joint, not so hard that you pull all the material out.
As soon as you have smoothed a section, remove the masking tape from that section before moving on. Pull the tape away at a 45-degree angle to the surface; this produces a clean, sharp edge without disturbing the fresh silicone.
Do not wait until you have finished the whole shower before removing tape. By then, the first sections will have started to skin, and you will tear the silicone when you pull.
Do not use the shower for at least 24 hours after siliconing. In ideal conditions around 23 degrees Celsius and moderate humidity, most shower silicones reach a surface skin within 30 to 60 minutes and are fully cured in 24 hours.
In Queensland during winter, lower temperatures can extend cure time to 36 to 48 hours. In summer humidity, silicone may skin more quickly, but full-depth cure still takes 24 hours.
During cure, keep the bathroom ventilated but prevent the shower from being splashed or turned on. Even a brief spray before full cure washes away uncured silicone and ruins the job.
Not every part of a shower gets silicone. These are the locations that must be siliconed:
The joint where the shower floor meets the wall is the most important and most commonly missed silicone location. This is a movement joint the floor and wall move independently as the building shifts and as thermal cycling occurs. This joint must always be silicone, never grout. If you see grout here, it will crack and it needs to be replaced with silicone.
The internal corners where two shower walls meet are also movement joints. Tiled correctly, these corners should have a grout-free joint filled with silicone. If you find grout in these corners, remove it and replace with silicone. Grout in shower corners is one of the most reliable ways to guarantee water ingress within a few years.
Every point where a shower screen frame, whether framed, semi-frameless, or a channel-mounted frameless screen, meets a tiled surface should be siliconed. This includes the bottom channel where the screen meets the shower floor and both vertical sides where the frame contacts the wall tiles.
Frameless shower screens require careful silicone work because the glass edge typically sits directly against or very close to the tile surface, leaving a narrow joint. Clear neutral cure silicone is the standard choice. It is invisible when cured and does not interrupt the clean visual line of a frameless installation.
Apply silicone to the full contact line on both the tile side and the floor/base side. Do not leave gaps assuming the glass contact itself is sufficient to stop water. It is not.
If you have a frameless shower screen installed and you are looking for the right silicone and service approach, Aquatech Grouting works alongside shower screen installations across Brisbane, the Gold Coast, and the Sunshine Coast, providing regrouting and silicone replacement as part of complete shower restoration services.
Anywhere a fixture penetrates a tiled wall, tap handles, shower mixer, hand shower bracket, or shower head arm, the flange that covers the pipe entry point should be siliconed to the tile surface. These are small joints, but they are directly exposed to water spray and fail regularly.
Use a small nozzle aperture here. You are filling a narrow gap between the flange and the tile, not a wide floor joint.
If your shower has a tiled niche or recessed shelf, the internal corners of that niche are four corners, and the joints where the shelf meets the niche sides are movement joints. They should all be siliconed, not grouted.
Common silicone mistakes include poor surface preparation, applying too much or too little sealant, choosing the wrong silicone, and allowing moisture to affect the curing process.
This is the most common and most damaging mistake. New silicone does not bond to old silicone. You can apply it, smooth it, and it will look fine for a few weeks or months. Then it starts to separate from the underlying material, water gets underneath it, and mould begins growing in the gap you thought you sealed.
Remove all old silicone before applying new. No exceptions.
Any moisture in the joint when you apply silicone is trapped behind the seal. That moisture creates the ideal conditions for immediate mould growth at the bond line. The silicone looks fine from the outside, but within weeks the joint turns grey or black from mould growing where you cannot reach it.
This is why the removal and cleaning step requires patience. In Queensland’s humidity, drying a shower joint can take four to six hours or longer after cleaning. A fan pointed into the shower space speeds this up significantly.
If you wait until you have finished siliconing the entire shower before removing the masking tape, the sections you started first will have skinned over. When you pull the tape away, it tears the silicone edge and produces a ragged line. Remove tape section by section, immediately after smoothing.
Some people apply silicone from left to right, then come back and add more going right to left because they feel the first pass was not enough. This creates double-up areas and thin areas and makes the smoothing step nearly impossible to do evenly. Apply in one direction only. If the first pass is not enough, smooth it, let it cure, and add a second pass on top.
Shower silicone typically lasts 5–10 years when properly applied and maintained. Factors such as moisture, mould, cleaning products, movement, and installation quality can affect its lifespan.
Standard silicone in a shower without anti-mould formula: 2 to 5 years before mould becomes a problem.
Anti-mould silicone in a shower that is regularly cleaned with appropriate products and well-ventilated: 8 to 12 years before replacement is needed for cosmetic or structural reasons.
Premium sanitary silicone with fungicide, applied correctly to a properly prepared surface: 10 to 15 years in ideal conditions.
In Queensland, where humidity is consistently higher than southern Australian states, expect the lower end of these ranges. Brisbane and Gold Coast bathrooms that are not well-ventilated and that use bleach-based cleaners regularly tend to see silicone deterioration faster than the product specifications suggest.
DIY shower silicone can suit minor resealing jobs, while professional help is better for recurring mould, leaks, damaged grout, or suspected waterproofing problems. For homes in Brisbane, the Gold Coast and Sunshine Coast, the right choice depends on the condition and cause of the issue.
DIY silicone application makes sense when the joint to be sealed is one or two short runs in a simple location, the seal around a tap flange, a single wall corner that has pulled away but is otherwise clean, or a bath surround where there is no old silicone residue.
If you have done silicone work before, you are comfortable with a caulking gun, and you have allocated the time to do the preparation properly, a small DIY silicone job is achievable.
Call a professional when:
The entire shower needs re-siliconing of multiple joints, floor-to-wall, corners, and around the screen. The time required to do this properly exceeds what most homeowners want to commit to a Saturday.
There is mould behind the old silicone that has penetrated the grout or the substrate. This requires more than new silicone; the surface needs proper treatment to prevent immediate regrowth.
The shower grout is also failing. Silicone and grout in a shower work together. A shower that needs new silicone usually also has grout that is starting to deteriorate. Doing silicone only while leaving failing grout in place means the water ingress problem is only partially addressed.
The shower screen frame is being replaced, or the shower itself is being renovated. Professional installation of silicone around new screens requires the right products for the glass type and the installation method.
Aquatech Grouting specialises in complete shower restoration across Brisbane, the Gold Coast, and the Sunshine Coast. Their work includes silicone removal and replacement as part of a full regrouting and shower restoration service. If your shower has multiple issues, old grout, failing silicone, and mould, addressing them together in one professional job is more cost-effective and delivers a lasting result. Visit aquatechgrouting.com.au to learn about their services or to arrange a free quote.
Silicone and grout are complementary materials in a tiled shower, but they serve different purposes and must not be confused or substituted for each other.
Grout fills the flat joints between tiles on walls and floors. It is rigid and does not flex. It provides a clean, consistent surface across the tile field and contributes to the overall waterproof system when properly sealed.
Silicone fills movement joints, the junctions between different surfaces or planes. It is flexible and accommodates movement without cracking.
The two materials must meet cleanly at the grout line where flat surfaces transition to movement joints. If grout encroaches into a silicone joint, it needs to be removed. If silicone is applied over intact grout on a flat surface, it creates an uneven, difficult-to-maintain result.
If your shower grout is deteriorating at the same time as your silicone is failing, the two problems are related. Failed grout allows water to reach the substrate, increasing moisture behind the tiles and accelerating silicone failure. The correct repair sequence is to regrout first, then re-silicone. Doing it in the reverse order wastes the new silicone.
Aquatech Grouting handles both grout replacement and shower silicone as part of the same service visit. Their regrouting specialists in Brisbane understand that both elements need to be in good condition for the shower to be genuinely waterproof.
If your shower needs silicone replacement or if you have read through this guide and realised the job is larger than you want to take on yourself. Aquatech Grouting provides professional shower restoration services across Brisbane, the Gold Coast, and the Sunshine Coast.
Their work covers:
Complete shower silicone removal and replacement across all joints floor-to-wall, corner-to-corner, and around shower screens.
Shower regrouting and silicone replacement together, because grout and silicone work as a system and both usually need attention at the same time.
Mould treatment before re-siliconing, ensuring the surface is properly prepared so new silicone does not fail immediately from mould behind the joint.
Frameless and semi-frameless shower screen silicone, using the correct clear or coloured neutral cure products for glass applications.
Commercial shower and bathroom silicone in Gold Coast and Sunshine Coast hospitality, accommodation, and strata properties.
Aquatech Grouting is a specialist regrouting business. They work across Greater Brisbane, including inner suburbs, northside, southside, bayside, and western suburbs. On the Gold Coast they cover Surfers Paradise, Broadbeach, Burleigh Heads, Robina, and Coolangatta. On the Sunshine Coast: They service Noosa, Maroochydore, Caloundra, Buderim, and surrounding areas.
Contact Aquatech Grouting for a free assessment and written quote.
Shower silicone skins over on the surface within 30 to 60 minutes in average conditions. Full cure when it is safe to expose the joint to water takes 24 hours under standard conditions of around 23 degrees Celsius. In cooler temperatures or higher humidity, allow 36 to 48 hours. In warm Queensland summers, surface skinning may occur faster, but a full cure still requires 24 hours minimum.
No. New silicone does not form a reliable bond with cured old silicone. The result looks fine initially but fails within months. All old silicone must be completely removed before new silicone is applied. This includes invisible residue left after the bulk material is peeled away. Treat the surface with silicone remover and clean with alcohol before applying the new product.
For most Australian showers with ceramic or porcelain tiles, a bathroom-grade anti-mould silicone in neutral cure or acetoxy cure formulation is the right choice. For showers with natural stone tiles, use neutral cure only. The brand matters less than the specification look for products labelled as sanitary silicone, bathroom silicone, or anti-mould silicone with a published fungicide formula.
Black discolouration in shower silicone is mould. Once mould penetrates the interior of the silicone joint, surface cleaning cannot remove it. The only solution is complete removal of the silicone and replacement with fresh anti-mould product after proper surface preparation. Products claiming to clean mould from silicone can treat surface mould but cannot address mould that has grown through the material from the inside.
In a well-maintained shower with good ventilation and anti-mould silicone, replacement every 8 to 12 years is typical. In bathrooms with poor ventilation, frequent bleach cleaning, or high use, silicone may need replacing every 3 to 5 years. Inspect your shower silicone annually and replace at the first signs of mould penetration, cracking, or separation rather than waiting until water damage becomes visible.
No. Allow a minimum of 24 hours before using the shower. The silicone may feel dry to the touch within an hour, but it is not waterproof until fully cured through the full depth of the joint. Water introduced before full cure washes uncured silicone from the joint and breaks the seal before it has formed.
Yes. Every trace of the old silicone must be removed. Even small residual areas of old cured silicone prevent the new material from bonding to the substrate. The new silicone bonds to the old residue, not to the tile or screen surface, and the old residue eventually releases, taking the new silicone with it.