Shower waterproofing is the single most critical phase of any bathroom construction or renovation in Australia. It is installed before the tiles go on; it functions invisibly behind the finished surface; and when it fails, the consequences accumulate silently within your wall and floor structure for months before they become visible.
Understanding what shower waterproofing actually is, what current standards require, how the installation sequence works, and where failures originate is not specialist knowledge reserved for builders. It is practical information that every homeowner overseeing a bathroom project in Australia needs before ordering any products or engaging a contractor.
This guide covers the complete subject from the National Construction Code 2022 requirements through membrane types, substrate selection, failure modes, climate considerations, state licensing rules, and what compliant installation actually looks like, step by step.
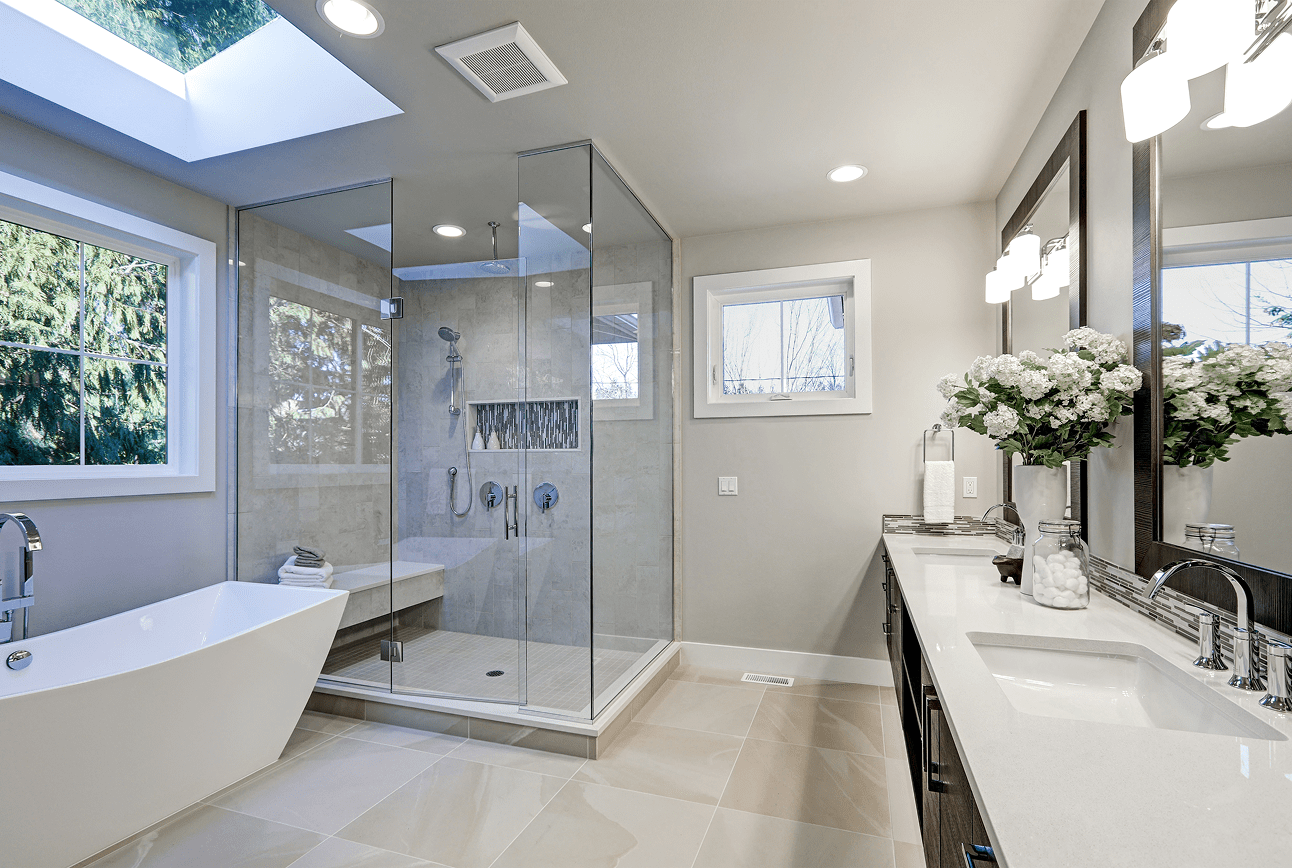
Shower waterproofing is the application of a continuous, impervious barrier across all surfaces of a shower recess before tiles or any other finish material are installed. Its function is to prevent water that passes through grout joints and fixture penetrations from reaching the substrate, framing, and floor structure behind the tiles.
The tiles on a shower wall are not waterproof. The grout between those tiles is not waterproof. Standard cement-based grout is porous. It absorbs water during every shower event. What prevents that water from saturating the building fabric behind the tiles is the membrane installed underneath them. The membrane is the system. The tiles are the finish only.
This distinction carries a significant consequence: a shower that looks perfectly finished, has all its tiles intact, and shows no visible cracks can have a completely failed waterproofing system behind it. The failure is not visible on the surface. It is visible only in the structural damage that results in staining, mould, rot, and delamination, which appears months or years after the membrane failed.
The National Construction Code 2022 defines two terms that are frequently used interchangeably in practice but have specific, different meanings under the standard. “Waterproof” means the property of a material that does not allow moisture to penetrate it. A compliant liquid-applied membrane on a shower floor is waterproof.
“Water-resistant” means the property of a system or material that restricts moisture movement and will not degrade under conditions of moisture. A water-resistant plasterboard substrate is water-resistant. It tolerates moisture exposure without structural failure, but it is not waterproof.
Both properties are required in a correctly constructed shower. The substrate must be water-resistant. The membrane applied to the substrate must be waterproof. The tile and grout provide the cleaning surface and abrasion resistance. Confusing these three layers or assuming that one compensates for a deficiency in another is the root cause of the majority of shower waterproofing failures in Australian residential construction.
Shower waterproofing in Australia is governed by two primary standards that work together. One specifies where and how the system must be installed. The other specifies what the membrane product itself must be able to do.
AS 3740:2021 is the principal installation standard for residential wet area waterproofing in all Australian states and territories. It replaced the 2010 edition and is referenced directly by the National Construction Code 2022, adopted nationally on 1 May 2023.
AS 3740:2021 specifies the location, height, extent, and method of waterproofing application required in domestic wet areas, including shower recesses, bathrooms, laundries, and wet rooms. Every licensed waterproofing contractor working on a residential property in Australia is required to install in accordance with the requirements of this standard or to demonstrate an equivalent that satisfies the Performance Requirements of the NCC.
AS/NZS 4858:2004 is the product performance standard for wet area membranes. It classifies membranes into types and specifies the physical properties, elongation, tensile strength, water absorption, and vapour permeability that a membrane product must demonstrate to be used in a compliant installation.
The minimum classification required for shower use is Class III. Any product used in a compliant residential shower waterproofing installation must meet AS/NZS 4858:2004 Class III criteria. High-performance water-based acrylic polyurethane membranes currently on the Australian market also meet this standard and offer superior workability, with higher build per coat than standard acrylic products.
A membrane that does not meet AS/NZS 4858:2004 Class III cannot be used in a compliant installation, regardless of how it is applied or what the contractor claims on the job site.
The 2022 edition of the NCC introduced the most significant changes to shower waterproofing requirements since the 2010 standard was published. These requirements are not recommendations. They are minimum legal performance criteria that all licensed builders and waterproofing contractors in Australia must observe.
Before any project begins, local council requirements and the full AS 3740:2021 standard should be reviewed, as some councils apply additional criteria beyond the NCC minimum.
NCC 2022 requires that the entire water-resistant wall lining of a shower area, both enclosed and unenclosed, must be waterproofed to a minimum height of 1,800 mm above the finished floor level, or 50 mm above the shower rose height, whichever dimension is the greater.
The previous NCC required waterproofing only at wall and floor junctions and at joints. The 2022 standard requires full surface coverage to 1,800mm on all walls within the shower zone. This change came directly from decades of defect data showing that shower spray contacts the entire wall surface, not just junctions, and that partial wall waterproofing was producing failures across the unprotected areas.
The entire floor within the shower recess must be covered by the waterproof membrane without exception. A minimum floor gradient between 1:80 and 1:50 must fall to the drain to ensure water moves away from the membrane surface rather than pooling against it.
Where a shower hob or step is present, the waterproof membrane must extend a minimum of 100mm over the hob and onto the bathroom floor beyond it. The hob itself must be fully encapsulated by the membrane system on all waterproofed sides.
The NCC 2022 distinguishes between enclosed and unenclosed showers because the waterproofing zone required for each is different.
An enclosed shower is bounded by walls or screens to a height of 1,800mm from the finished floor level, including hinged or sliding doors that control the spread of water to within the enclosure. A frameless glass shower screen alone does not constitute an enclosure for NCC 2022. A shower fitted over a bath shorter than 1,500mm in length is also treated as unenclosed.
An unenclosed shower is open on one or more sides. For an unenclosed shower, the waterproofing zone extends 1,500mm horizontally from the shower connection point on the wall, in all directions, to a height of 1,800mm. The full floor area within this horizontal zone must also be waterproofed. The practical implication is that unenclosed showers require a significantly larger waterproofed area than enclosed showers.
All internal corners and junctions in the shower recess, specifically floor-to-wall and wall-to-wall junctions, must be treated with bond breakers before the membrane is applied. A bond breaker is a backing rod or similar flexible insert that prevents the membrane from bonding rigidly across a movement joint and cracking as the building assembly moves.
Without bond breakers at junctions, the membrane will crack at every internal corner over time as the building moves under load and thermal cycling. Junction cracking is the leading cause of shower leaks in Australian residential construction. It is invisible beneath the tiles and presents externally as staining or structural damage months or years later.
If you are concerned your existing shower may already be showing the signs of junction failure, the guide to recognising when your shower waterproofing has failed covers the warning signs in detail.
Where a bathroom is located above ground floor level, or where the subfloor structure consists of timber, plywood, or particleboard, the entire bathroom floor must be waterproofed, not just the shower recess. This requirement reflects the elevated structural risk when water breaches a membrane in an upper-level installation and migrates into the subfloor and the ceiling of the room below.
The following process reflects compliant practice under NCC 2022 and AS 3740:2021 for a standard domestic shower in Australia. Every step in this sequence is load-bearing. Skipping or shortening any step creates a defect that may not be visible for months but will eventually manifest as a structural failure. The tiling and waterproofing service carried out by qualified QBCC licensed contractors follows this full sequence without exception.
The substrate, whether fibre cement board, water-resistant plasterboard or concrete, must be structurally stable, clean and free of contaminating materials before waterproofing can begin. This includes removing all paint, oil, curing compounds, adhesive residue, and loose surface particles.
Joints between substrate sheets must be filled and sanded flush. Fastener heads must be countersunk and filled. Any sharp protrusion will create a stress point in the membrane film and a potential future failure location.
The critical rule that applies in every situation: you cannot waterproof over an inadequate substrate. If the substrate deflects under load, has been saturated by a previous leak, or is structurally compromised, no membrane product will compensate. Substrate repair and replacement are mandatory before waterproofing commences, and in renovation work, the extent of substrate damage is often only knowable after the existing tiles have been removed.
Primer is applied to all surfaces that will receive the membrane. It serves three essential functions in the waterproofing system.
First, primer controls the porosity of the substrate, preventing the membrane from absorbing at different rates across the surface and producing uneven dry film thickness. Second, it consolidates residual surface dust, even after thorough cleaning; some dust and fine particles remain on every substrate, so that the membrane bonds to the substrate rather than to loose contaminating material. Third, it establishes mechanical adhesion between the substrate chemistry and the membrane chemistry, which most quality primer products achieve across cement sheets, concrete, fibre cement, plasterboard, and timber substrates.
Omitting the primer is the most common installation defect observed in failed shower waterproofing systems in Australia. The membrane may initially appear to adhere. The defect manifests as delamination from the substrate within 12 to 24 months, presented as hollow tiles, cracked grout, or active leaking.
Apply primer by brush to corners, junctions, and detail areas, and by roller or broom across flat wall and floor surfaces. Allow 15 to 30 minutes drying time at 23°C before applying the membrane. In cooler temperatures or in higher humidity conditions, both of which are common at different times of the year across coastal Australian locations, allow longer and confirm the surface is dry to the touch before proceeding.
Before the first membrane coat is applied, wet area tape must be applied and embedded at all floor-to-wall junctions, internal wall corner junctions, and substrate sheet joints.
Wet area tape is a reinforcing mesh embedded in a bed of membrane at movement junctions within the shower. It physically bridges the junction while maintaining membrane continuity across the joint. When the substrate assembly moves, which all building assemblies do under load, thermal cycling, and seasonal humidity change, the reinforced junction flexes without cracking. Surface joints in showers that are not treated with wet area tape will cause the membrane to crack at those joints over time, producing an active leaking path that reaches the substrate behind the tiles.
Wet area tape is mandatory at every internal corner junction of the shower recess, at every floor-to-wall junction, at every substrate sheet joint within the waterproofed zone, and under shower grates and outlets. Use a good-quality product with a strong adhesive and sufficient width to achieve complete coverage over each joint.
Apply the first coat of liquid membrane by brush to all corners, junctions, and areas around penetrations where shower fittings pass through the substrate. Then apply by roller across all flat wall and floor surfaces. Confirm that all wet area tape is fully embedded and encapsulated in this first coat with no voids or dry spots over the tape mesh.
Coverage must extend to the full NCC 2022 required zone: entire floor, all walls to 1,800mm, full hob coverage with 100mm extension onto the bathroom floor. Allow this coat to cure fully before applying the second coat. Do not apply the second coat when the first is still wet or tacky. The contact area between two uncured coats produces a layered membrane that does not develop the fully cross-linked polymer structure required for long-term waterproofing performance.
Apply the second coat in a direction perpendicular to the first. Applying in a crossing direction ensures even film build across the entire surface and reduces the risk of pinholes, thin spots, and areas of inadequate coverage.
The combined dry film thickness after both coats must reach a minimum of 1mm on shower floors and 0.5mm on shower walls. These are post-cure measurements, the dry film after the water from the liquid membrane has evaporated during curing. The wet film applied to the surface during application is thicker than the resulting dry film. Do not assess thickness during application. Assess it after full cure if in doubt about coverage rate.
Drying time between coats averages 2 to 4 hours at 23°C. A 10-year guarantee on the membrane product is achievable where this full two-coat specification, meeting Class III AS/NZS 4858 to the required thicknesses, is correctly completed.
The second membrane coat must be fully cured before any tiling commences. Tiling before full cure traps moisture beneath the tile adhesive layer, inhibits the membrane’s final curing cycle, and compromises the bond between the adhesive and the membrane surface.
At standard laboratory conditions of 23°C and 50% relative humidity, the second membrane coat requires 2 to 3 hours before tiling can commence in an undertile application. This timeline is the industry reference, but it does not reflect real site conditions in most of Australia.
In Queensland’s subtropical coastal summer with relative humidity regularly exceeding 75% across Brisbane, the Gold Coast, and the Sunshine Coast, membrane cure time is extended. In Melbourne’s cooler and wetter winter conditions, cure time is extended further. In inland summer heat exceeding 35°C, cure may be faster, but the membrane applied to superheated substrate surfaces can exhibit blistering and pinhole formation.
The correct approach in every climate is to follow the specific manufacturer’s technical data sheet for the product in use rather than relying on a rule of thumb. Product specifications account for the full range of site conditions that affect cure performance.
Before any tiles are installed, a flood test should be conducted. The shower drain is plugged, the floor is flooded to a water depth that covers the floor-to-wall membrane junction, and the water level is monitored over a 24-hour period. Any drop in water level indicates a defect in the membrane, a pinhole, a junction gap, or an area of insufficient thickness.
A flood test identifies membrane defects while they are accessible and correctable, before tiles conceal them. It is the only quality assurance step that confirms membrane integrity before the finish layer is applied. Once tiling is complete, the same membrane defect becomes a failed shower requiring full strip out and rebuild, at a cost many times greater than the correction that would have been possible at the membrane stage.
For the approach taken on real Brisbane and South East Queensland projects, including what inspections involve and what a fully compliant rebuild looks like from strip-out to retiled finish, the past project documentation shows examples of this process in practice.
When it comes to building a leak-free and long-lasting shower, choosing the right waterproofing membrane plays a crucial role. From liquid-applied coatings to sheet membranes, each type offers unique benefits in protecting your bathroom from water damage, mold, and structural issues.
The most widely used membrane category in residential shower construction across Australia. Water-based products are applied in two coats by brush and roller. Compliant with AS/NZS 4858:2004 Class III requirements when applied to the specified thickness.
A higher performance version of the liquid applied category, these products combine the workability of acrylic with the elongation properties of polyurethane chemistry. They meet Class III AS/NZS 4858:2004 requirements and offer superior workability with higher build per coat, making it easier to achieve the required dry film thickness across complex geometries and corner conditions.
For residential once-off projects, the consistently recommended solution is a three-part system: an appropriate primer for the substrate, wet area tape at all junctions, and an acrylic polyurethane waterproofing membrane that meets the full AS/NZS 4858:2004 Class III requirement. This combination breaks the installation into clearly defined steps and allows for the required waiting times between each product that are essential to the performance of the finished system.
High elongation membranes are specified where elevated substrate movement is anticipated. This category is appropriate for upper-floor bathrooms on timber subfloors, showers adjacent to structural movement joints, and commercial installations with high daily use frequency.
Superior elongation means the membrane maintains integrity across greater substrate movement than standard acrylic products can accommodate. Waterproof membranes in the polyurethane category often carry a 10-year product guarantee when installed according to the manufacturer’s technical data sheet on a correctly prepared substrate.
Best suited for: upper-floor bathrooms, timber or particleboard subfloors, and showers in high-movement structural environments.
Pre-cured polymer sheets are bonded to the substrate surface with a compatible adhesive. Sheet membranes eliminate the variable of liquid application technique and deliver consistent, measurable thickness across the waterproofed surface. They are more common in commercial, institutional, and high-volume residential installations than in standard residential work.
The critical performance requirement with sheet membrane installation is correct joint lapping and corner detailing. Where sheet overlaps and corner details are incorrectly executed, the failure point is the joint rather than the sheet itself.
Best suited for: Commercial wet areas, institutional shower facilities, high-volume shower blocks.
Two-component cement-based products are mixed on site and applied by brush. Used primarily in applications requiring crystalline waterproofing, including external applications, below-grade tanking, and pool waterproofing. Less common in standard residential shower applications, but is used in some commercial and structural wet area contexts.
A distinct category of penetrating liquid membranes applied through existing grout lines and tile joints in a leaking shower where tile removal is not practical. These products seal the tile and grout surface from above, providing a barrier against further water ingress through the finish layer.
The critical limitation of this category is clearly defined: remedial over tile membranes do not replace or repair a failed membrane beneath the tiles. They do not treat structural damage or substrate saturation. They are appropriate only where the original membrane beneath the tiles is confirmed to be intact, and the grout itself is the primary failure point.
Applying a remedial membrane over tiles in a shower where the substrate behind the tiles is saturated, and the underlying membrane has failed, seals moisture against the substrate, preventing the natural drying cycle between showers. In South East Queensland’s warm, humid climate, this creates accelerated mould growth conditions within the wall cavity.
Understanding the difference between these two scenarios, grout failure with an intact membrane versus a failed membrane with saturated substrate, is essential before committing to any repair approach. The guide to leaking shower repairs in Brisbane, Gold Coast, and the Sunshine Coast explains how to diagnose which applies to your shower.
For the question of whether grout type affects your waterproofing outcome, the detailed comparison of epoxy grout versus cement grout and their impact on waterproofing is relevant reading before any grout selection decision is made.
The substrate placed behind shower tiles forms the structural and chemical foundation for the waterproofing system. The membrane adheres to the substrate. The tiles adhere to the membrane surface. If the substrate fails through structural movement, moisture saturation, or dimensional change, the entire system above it fails, regardless of the quality of the membrane or the tile product.
The most common substrate used in residential shower construction across Australia. Endorsed for wet area use by the Housing Industry Association, Master Builders Australia, and BRANZ when correctly primed and waterproofed with a compliant membrane system.
Key performance attributes:
The dimensional stability of water-resistant plasterboard is a material performance advantage in Australian coastal climates where relative humidity varies significantly across seasons. Fibre cement board expands and contracts with changes in ambient humidity. Over time, this hygroscopic movement causes cracking at cornice lines, internal joints, and corner junctions. These cracks become water ingress paths if they occur within or adjacent to the waterproofed zone.
Water-resistant plasterboard does not exhibit this degree of hygroscopic movement. In a climate like South East Queensland’s, where relative humidity ranges from approximately 55% in winter to above 80% in summer, this dimensional stability reduces the cumulative stress on the membrane system at all junctions over the life of the installation.
A dense and rigid substrate is used where tile weight, impact resistance, or substrate stiffness is the primary requirement. Large format tiles and stone finishes benefit from the reduced deflection that fibre cement provides compared to lighter substrates.
Performance limitation in humid climates: Fibre cement expands and contracts with moisture. In high-humidity environments like coastal Queensland, this hygroscopic movement over time leads to cracking at joints and cornice lines. Bond breakers at all joints are essential regardless of substrate material, but they are particularly critical with fibre cement in humidity cycling conditions.
The highest density option for residential wet area substrates. Used where maximum substrate rigidity is required, including large format stone tiles and heavy tile formats where substrate deflection must be minimised.
Applicable in shower waterproofing where the tile weight or format demands maximum substrate stiffness. Bond breakers at all movement junctions remain mandatory regardless of substrate density or rigidity.
Shower tiles may resist water, but grout is porous and lets moisture seep through, which can lead to leaks, mold, and hidden damage without proper waterproofing underneath.
Standard cement-based grout absorbs water under normal shower conditions. This is not a defect in the grout. It is an inherent property of cementitious grout that no sealer product can permanently eliminate. Water passes through the grout joint during every shower cycle, reaches the tile adhesive layer and the membrane surface beneath it, and either drains to the shower floor or evaporates between shower events.
In a correctly waterproofed shower, this is the intended function of the system. The membrane beneath prevents the water from reaching the substrate. In a shower without a compliant membrane, this routine water movement reaches the substrate with every shower event and begins the cycle of saturation and structural damage that eventually presents as a major repair.
Epoxy grout is chemically different from cement grout in a way that is directly relevant to wet area performance. The water absorption of epoxy grout products commercially available in Australia is near zero; some products specify an absorbency rate of 0.0001%, which is comparable to the tile itself rather than to cement grout.
This near-zero absorption means that water does not pass through the grout joint in meaningful quantities when epoxy grout is correctly installed and the joints are fully sealed to the tile edges. The practical benefit is that the membrane beneath the tiles is exposed to significantly less cyclic water contact over the life of the installation, which extends the effective service life of the membrane.
Epoxy grout does not replace the requirement for a compliant membrane beneath the tiles. Even with epoxy grout installed throughout the shower, a waterproof membrane to AS/NZS 4858:2004 Class III standard installed under the tiles is mandatory for compliance with NCC 2022. Epoxy grout extends the performance interval of the finish layer. The membrane underneath is what makes the system waterproof.
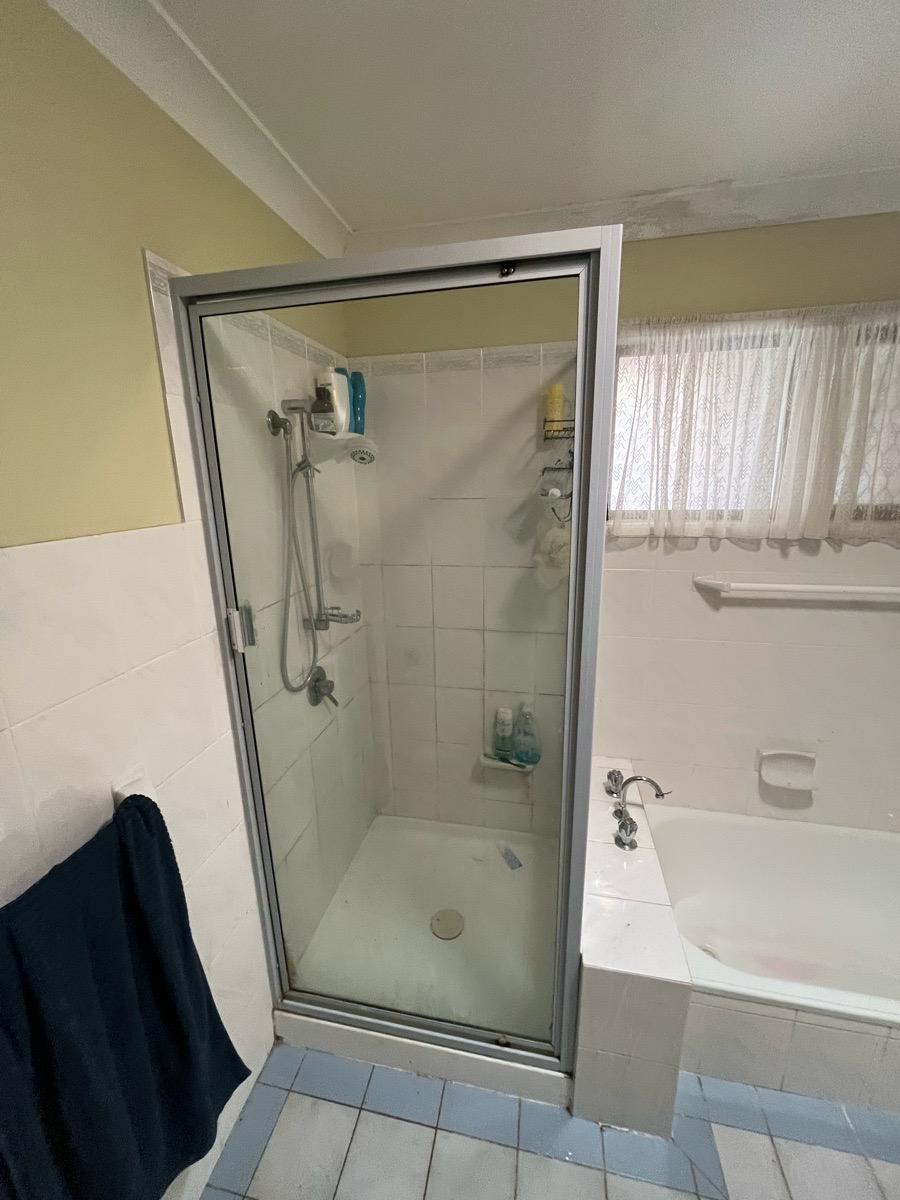
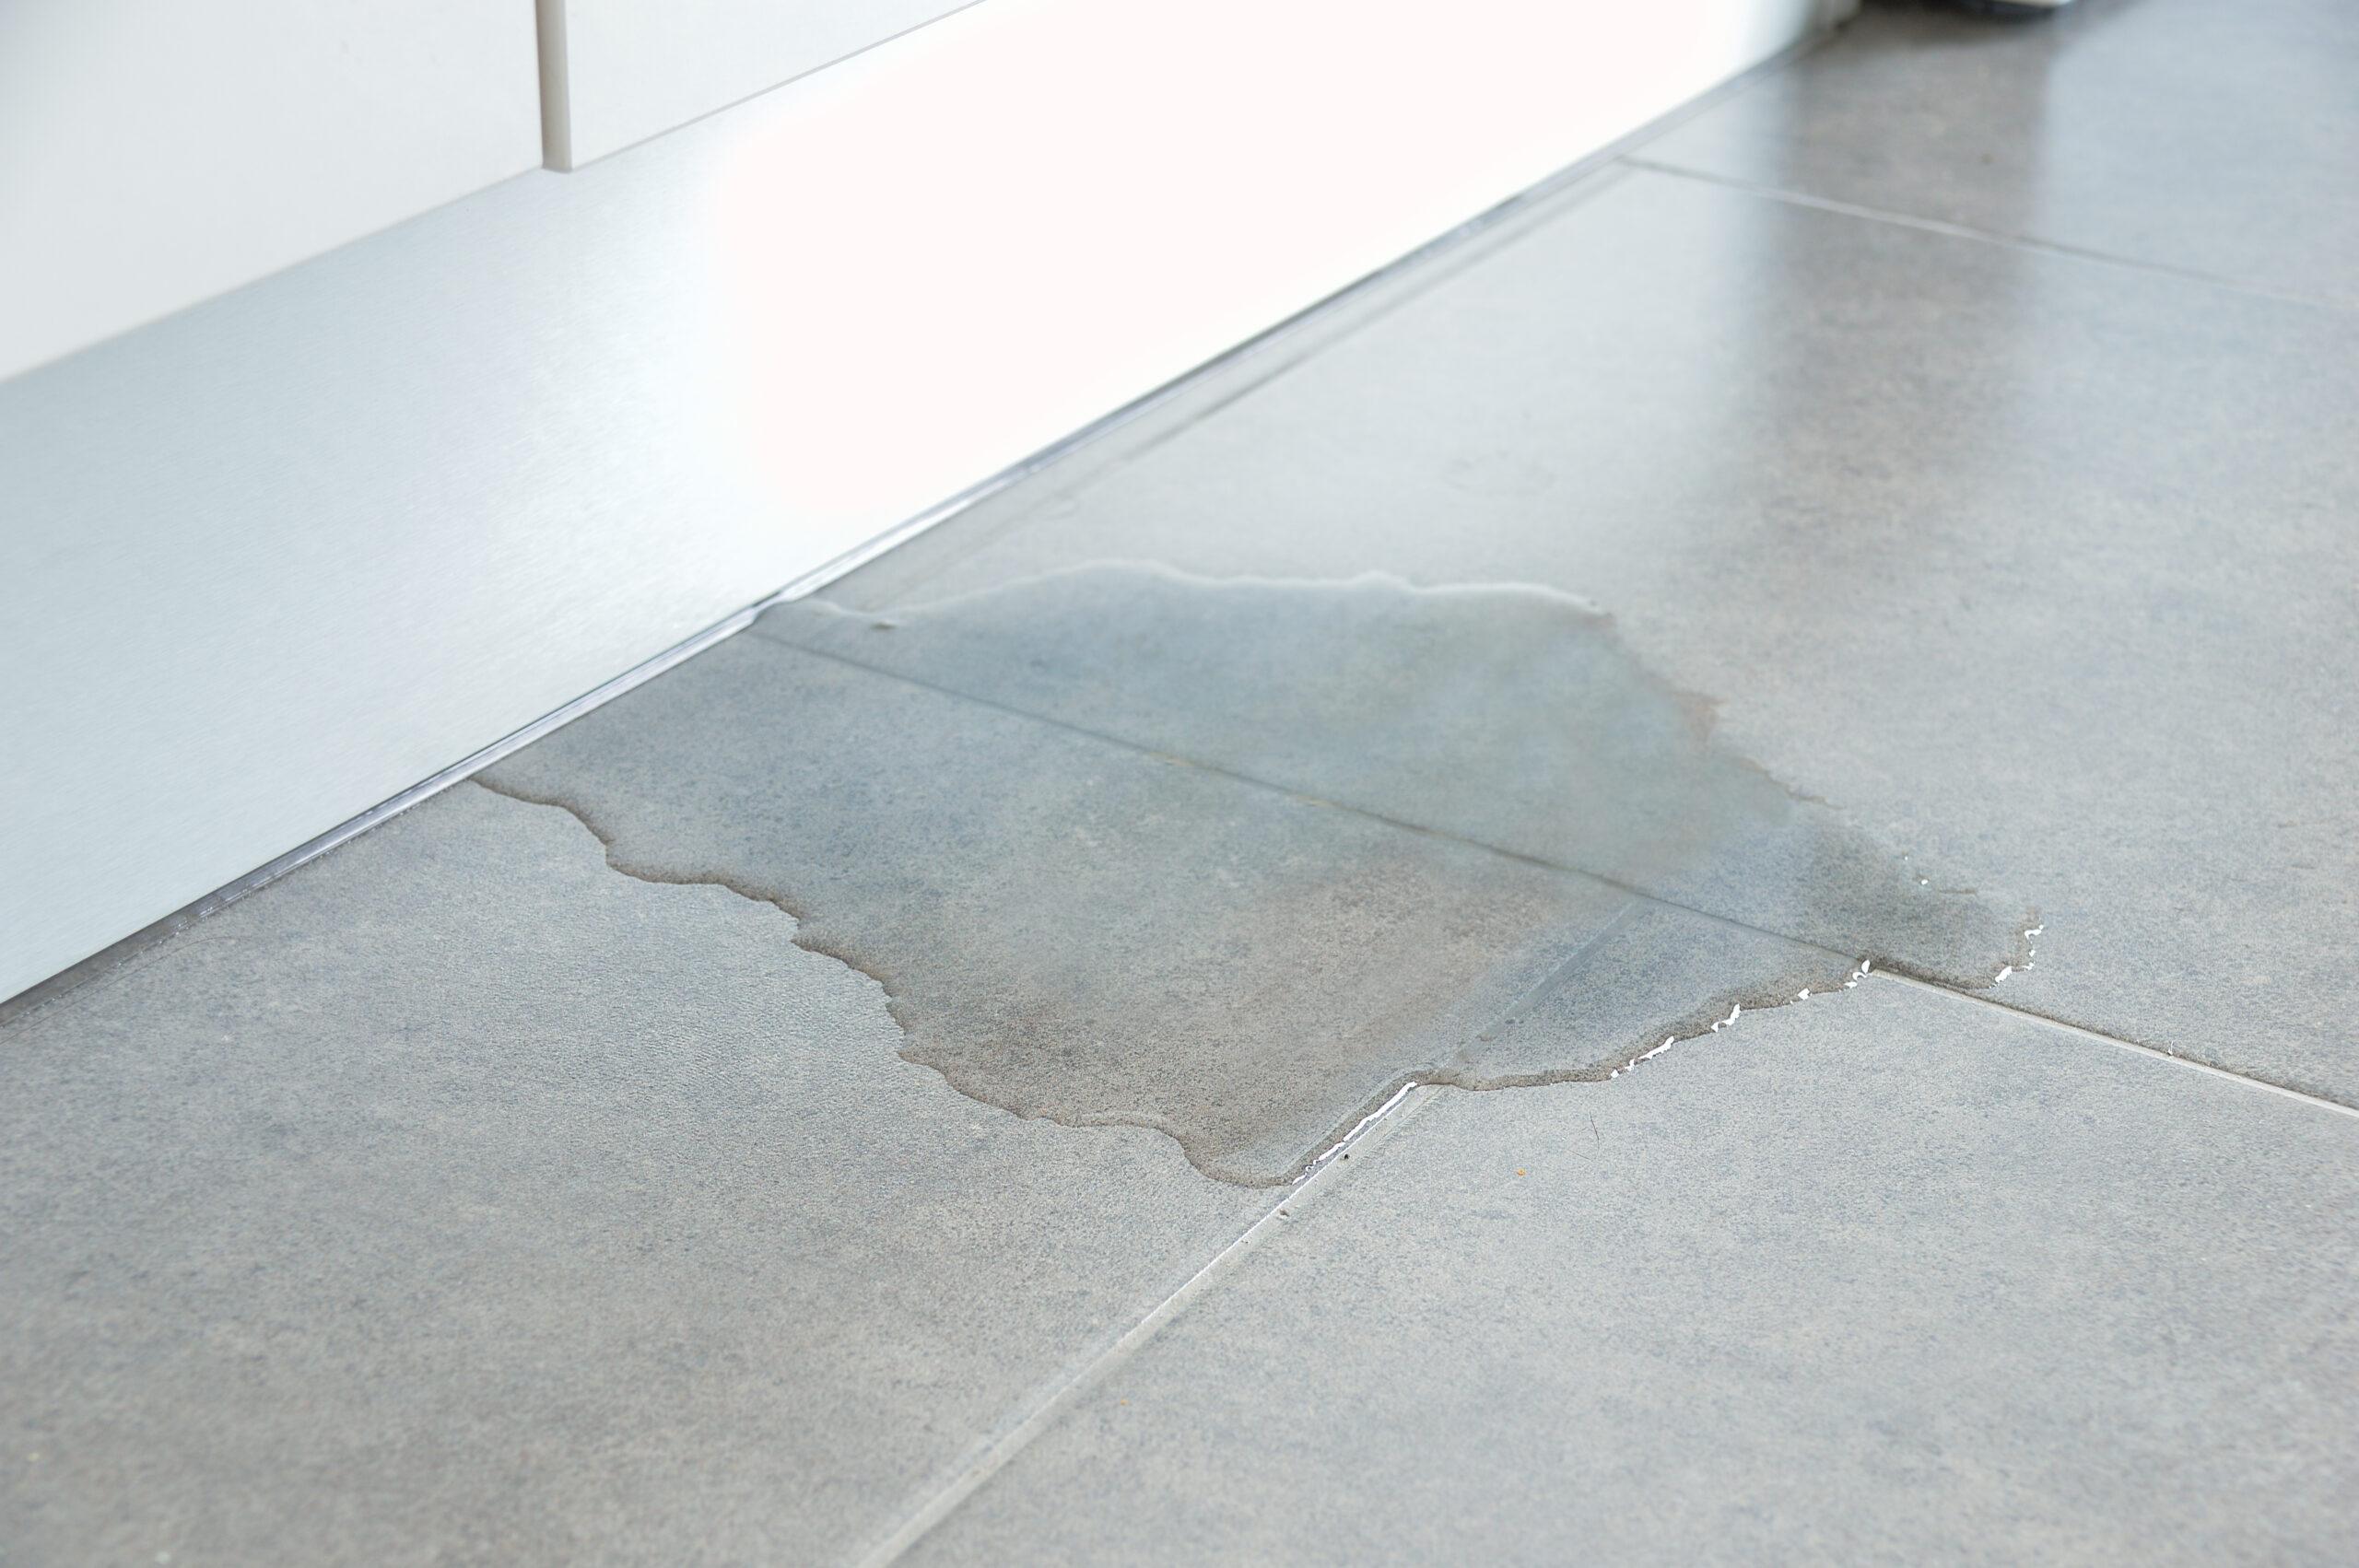
The assumption that a fully tiled shower is waterproof is one of the most prevalent and costly misconceptions in Australian residential building. It appears across bathroom renovation projects at every budget level. The tiles may be pristine. The grout may appear intact. The shower may have been in daily use for three years. None of this confirms that the assembly is waterproof.
If a compliant membrane was not installed beneath the tiles or if the membrane was installed incorrectly, water has been reaching the substrate with every shower event for those three years. What is visible on the surface is a finished bathroom. What is building up behind the tiles is substrate saturation, mould growth in the wall cavity, and the beginning of structural timber and framing deterioration.
The shower regrouting service addresses grout restoration as a surface maintenance function. Where the grout has failed, but the underlying membrane is intact, regrouting restores the finish layer. Where the grout failure is masking an underlying membrane or substrate problem, regrouting alone does not address the cause.
Shower waterproofing often fails due to poor installation, improper membrane application, weak sealing, bad drainage, low-quality materials, and not meeting building standards.
The membrane cannot form adequate mechanical adhesion to the substrate surface without a primer. Where primer is omitted, the membrane bonds to residual dust and surface contamination rather than to the substrate material itself. Delamination occurs progressively under moisture cycling. The tile adhesive bond is also compromised as the membrane lifts from the surface. This defect typically presents as hollow tiles and cracked grout 12 to 24 months after installation. By the time it is visible, re-waterproofing to resolve it requires tile removal.
The membrane cracks at every unprotected internal corner and floor-to-wall junction as the building moves under load and thermal cycling. This is the single most common cause of shower leaks in Australia. It is invisible beneath the tiles. It presents externally as water staining at the base of the wall adjacent to the shower, as efflorescence through grout at corner junctions, or as structural damage in the floor below an upper-level bathroom. By the time symptoms appear, water has been passing through the cracked junction for months.
One coat instead of two, inadequate roller coverage in corners, or insufficient product volume results in areas below the minimum dry film thickness of 1mm on the floor and 0.5mm on the walls. Thin areas are mechanical weak points that crack or perforate under substrate movement and the physical contact of tiling tools. Areas of insufficient thickness do not deliver the elongation and tensile performance for which the product was tested under AS/NZS 4858:2004.
Tiling before the second membrane coat has reached full cure traps moisture between the membrane and the adhesive layer. The membrane does not complete its polymer cross-linking cycle. The resulting cured membrane is softer and more permeable than the specified performance. The adhesive bond to the membrane surface is also reduced. Tiles delaminate and grout cracks earlier than they would over a fully cured compliant membrane.
Waterproofing that terminates significantly below 1,800mm on shower walls creates an unprotected zone through which shower spray contacts the substrate directly in every use cycle. In an enclosed shower, this defect may be limited to a relatively small wall area. In an unenclosed shower where the coverage zone extends 1,500mm horizontally from the wall connection, the unprotected area can be substantially larger. This defect is common in installations completed before the 2022 standard changed the height requirement from junction-only treatment to full surface coverage.
Where shower fittings, the shower rose, mixer body, shelf brackets, and any other hardware penetrate the substrate, the membrane must be sealed continuously and completely around each penetration. An unsealed penetration is a direct water ingress pathway that bypasses the entire membrane system. Water entering at a rose or mixer penetration reaches the substrate, the wall cavity, and the framing behind at a concentration point, typically producing faster structural damage than a diffuse junction failure because the water is channelled to a single location.
If your current shower is showing any of the visual warning signs of a failing membrane, hollow tiles, efflorescence through grout, staining on adjacent walls, or a musty odour in the bathroom, the guide to identifying waterproofing failure covers the full diagnostic sequence.
Water passes through degraded grout or a cracked junction membrane with every shower event. The substrate behind the tiles begins absorbing water during each shower and partially dries between events. No external sign is visible. The grout lines may look intact. The tiles are flush and stable. The shower appears functional.
Inside the wall cavity, the substrate is cycling between wet and partially dry conditions with each daily use. Residual moisture in the substrate wall creates the environment for the earliest stage of mould colony establishment. If the substrate is fibre cement, micro-cracking at internal joints begins as the material cycles through moisture and drying.
By months 12 to 18, the substrate is no longer drying completely between shower events. The wall cavity remains persistently moist. Mould growth has established in the cavity. Where structural timber framing sits behind the substrate, common in Australian timber framed residential construction, including weatherboard, brick veneer and steel framed homes, the framing begins to absorb moisture from the wet substrate.
By month 24 to 36, a tile at the floor to wall junction lifts or sounds hollow when tapped. Paint on the adjacent bathroom wall or bedroom wall begins to bubble. A faint stain appears on the ceiling of the room below in an upper-level bathroom. These are the first external signs of what has been a year or more of internal water migration.
By months 12 to 18, the substrate is no longer drying completely between shower events. The wall cavity remains persistently moist. Mould growth has been established in the cavity. Where structural timber framing sits behind the substrate, common in Australian timber-framed residential construction, including weatherboard, brick veneer, and steel-framed homes, the framing begins to absorb moisture from the wet substrate.
By months 24 to 36, a tile at the floor-to-wall junction lifts or sounds hollow when tapped. Paint on the adjacent bathroom wall or bedroom wall begins to bubble. A faint stain appears on the ceiling of the room below in an upper-level bathroom. These are the first external signs of what has been a year or more of internal water migration.
Australia’s diverse climate can significantly impact shower waterproofing performance. High humidity, temperature fluctuations, and coastal conditions can weaken membranes, reduce adhesion, and increase the risk of leaks, mold, and long-term damage if the right materials and methods aren’t used.
South East Queensland’s subtropical climate creates conditions that are more demanding on shower waterproofing systems than temperate southern Australian climates. Brisbane’s average relative humidity sits around 60% in the drier winter months and rises to 80 to 90% during summer. Gold Coast and Sunshine Coast coastal locations sustain high humidity year-round due to proximity to the ocean.
This continuous humidity cycling causes expansion and contraction in all substrate materials, particularly fibre cement and timber. Bond breakers and flexible membrane products rated for high elongation performance are particularly important in these conditions.
The addition of coastal salt air on the Gold Coast and Sunshine Coast accelerates the degradation of silicone sealants at screen frames and corner junctions. Silicone service life in coastal Queensland is typically 5 to 8 years rather than the 8 to 12 years achievable in inland or southern climates. When silicone deteriorates and separates from the substrate surface, it creates a direct water channel into the junction behind it, the highest risk location for membrane damage in any shower.
Membrane cure times are also extended in humid summer conditions in South East Queensland. Contractors applying membrane on a humid summer day with ambient relative humidity above 75% must allow longer between coats than the standard reference of 2 to 4 hours at 23°C.
Greater seasonal temperature variation in temperate southern climates creates annual thermal cycling that places cumulative stress on junction treatment and silicone sealants. Winter temperatures slow membrane cure, requiring extended intervals between coats. Summer heat can cause blistering where the membrane is applied to substrate surfaces in direct sunlight at temperatures exceeding 30°C. The combination of wet winters and dry summers produces an annual hygroscopic cycle in all substrate materials.
In arid inland Australia, low humidity means faster membrane cure and reduced hygroscopic movement in substrates. However, extreme summer temperatures in roof and ceiling spaces in upper-level bathrooms can cause substrate movement that challenges membrane flexibility at elevated temperatures. Alpine and high altitude locations require membrane products specified for cold temperature application and cure, as standard acrylic products may not perform correctly at temperatures below 10°C during application.
Shower waterproofing differs between new construction and renovation projects. New builds allow for a complete, properly planned waterproofing system from the ground up, while renovations often require working around existing structures, making surface preparation and compatibility even more critical.
In new residential construction, the waterproofing contractor works on fresh substrate with no existing membrane, no tile removal, and no uncertainty about substrate condition. The full installation sequence, substrate preparation, primer, tape, two membrane coats, and flood test can proceed without interruption under controlled conditions.
The risk in new construction is schedule pressure. Building timelines in the volume residential market are compressed. Waterproofing may be scheduled for a single day to keep the tile trade moving. Under this pressure, the intervals between membrane coats are shortened, the flood test is omitted to allow tiling to commence, and the membrane may not reach full cure before adhesive is applied. The resulting installation passes visual inspection and may pass the building inspection at completion. The defect does not appear until months or years later.
In a bathroom renovation, existing tiles must be removed before waterproofing can be assessed or applied. Tile removal in a renovation routinely reveals conditions that were not predictable from the external surface: delaminated or absent original membrane, saturated and structurally compromised substrate, rotted or corroded wall framing, or subfloor damage in an upper-level bathroom.
The renovation waterproofing scope cannot be fully determined before tile removal. A renovation quote should include a discovery allocation and a scope adjustment process to be triggered once the condition of the substrate and framing is confirmed. Attempting to tile over an existing waterproofed shower without stripping and re-waterproofing the assembly is not compliant under NCC 2022. The existing membrane integrity cannot be verified from the outside, and any adhesive loads from new tiles applied over the old surface create additional stress on a membrane whose condition is unknown.
Understanding the full cost and scope of what a renovation might involve before the tiles come off is important for budget planning.
The licensing requirements for residential wet area waterproofing vary by state and territory. This variation has direct practical consequences for homeowners engaging contractors, particularly in relation to insurance, compliance certification, and statutory warranty entitlements.
State / Territory | Licensing Requirement | Compliance Certificate |
Queensland (QLD) | QBCC licence mandatory for wet area waterproofing | Form 43 or Form 16 is required for building inspection |
New South Wales (NSW) | Licensed waterproofer mandatory, homeowner DIY not permitted in wet areas | Certificate required for inspection and insurance claim |
Victoria (VIC) | A licensed contractor must lodge a certificate with VBA within 5 business days | VBA certificate required for compliance |
Western Australia (WA) | Licensed professional required in most Class 1 residential applications | Certificate required |
South Australia (SA) | A licensed professional strongly recommended | Certificate recommended |
Tasmania (TAS) | A licensed professional recommended | Certificate recommended |
Australian Capital Territory | Licensed professional required | Certificate required |
Northern Territory | A licensed professional recommended | Certificate recommended |
In Queensland and New South Wales, waterproofing your own shower in a residential property is not legally permitted. Without a licensed contractor, a compliance certificate cannot be issued. Without a compliance certificate, the work cannot pass a building inspection, the homeowner cannot make an insurance claim on the waterproofing work, and the statutory warranty under Queensland and NSW consumer law does not apply.
The QBCC licence for a contractor can be verified before engagement at the QBCC licence search on the Queensland Building and Construction Commission website at qbcc.qld.gov.au.
Cost variation is driven by shower floor area and total wall area, substrate type and condition, whether the installation is at ground floor or upper floor, the membrane product category specified, and the inclusion of licensing and compliance certification overhead.
A quote that is significantly below the market range for compliant work with all steps and materials included typically reflects one or more of the following: an unlicensed contractor who cannot issue a compliance certificate, a specification that omits primer, tape or the flood test, a membrane product that does not meet AS/NZS 4858:2004 Class III, or a coverage area that does not extend to the full NCC 2022 zone requirements.
For a detailed breakdown of what grouting and related wet area service costs look like in South East Queensland, the cost guide to shower regrouting provides current market reference pricing.
The selection of a contractor is as consequential as the specification of the materials. A compliant material specification installed by an unlicensed or insufficiently experienced contractor produces a non-compliant installation. The following are the non-negotiable verification steps before engaging anyone for shower waterproofing work in Australia.
In Queensland, verify through the QBCC licence search that the contractor holds a current licence covering waterproofing work. In NSW, verify through the Service NSW licence check. In Victoria, verify through the Victorian Building Authority register. Complete this step before signing any contract or paying any deposit.
Ask for the membrane product name and request a copy of the technical data sheet. Confirm that the product meets AS/NZS 4858:2004 Class III requirements. Confirm that the product is appropriate for the specific substrate type in your shower; not all membranes perform equally on all substrates. A contractor who cannot provide the product name and data sheet on request has not fully specified the work.
Ask specifically which primer product will be used, on which substrate, and how it will be applied. Primer is substrate-specific. An acrylic primer suitable for plasterboard may not be appropriate for fibre cement. A contractor who cannot answer this question has likely not planned the primer step correctly.
Confirm that wet area tape will be applied at all internal corner junctions, all floor-to-wall junctions, and all substrate sheet joints within the waterproofed zone. This must be included in the specification, not offered as an optional upgrade.
Ask whether a flood test will be conducted before tiling commences. If the answer is no, ask for the written justification. The flood test is the only step that confirms membrane integrity before tiles conceal it for the life of the installation.
In Queensland, ask before engagement whether a Form 43 or Form 16 will be issued upon completion. If the contractor declines to issue or cannot issue a compliance certificate, this is a significant indicator that either the contractor is not licensed or the work scope does not meet the certifiable standard.
Understand three separate warranty mechanisms before engaging: the membrane product manufacturer’s warranty, the contractor’s workmanship warranty, and the statutory warranty that applies to all residential building work under Queensland and Australian consumer law. Ask what each covers, its duration, any conditions that must be met to maintain it, and who to contact if a problem occurs. The Aquatech Grouting warranty terms outline the coverage applied to all completed work.
A compliant shower waterproofing system in Australia consists of the following eight elements, each of which must be present for the system to perform to the standard required by NCC 2022 and AS 3740:2021.
When all eight elements are present, shower waterproofing performs without failure for its full design life. When any element is absent, the system has a defect. The defect is invisible. The outcome is structural damage within the building fabric that grows more extensive and more expensive to remediate for every month it goes unaddressed.
If you are planning a new shower installation, a bathroom renovation, or a repair to a shower that is showing signs of waterproofing failure, the first step is a formal assessment by a licensed contractor who can evaluate the current condition and provide a written specification for compliant work.
Aquatech Grouting is a QBCC-licensed regrouting and waterproofing specialist serving residential and commercial clients across Brisbane, the Gold Coast, and the Sunshine Coast. All waterproofing work is carried out to NCC 2022 and AS 3740:2021, using AS/NZS 4858:2004 Class III compliant membrane products with written warranty documentation provided on completion.
The full service range covers shower regrouting and grout restoration, tiling and waterproofing for new and renovation projects, shower screen supply and installation, leak detection and leaking shower repairs, and specialist remediation for showers with evidence of existing waterproofing failure.
Compliant shower waterproofing is not a premium upgrade. It is the legal minimum and the only reliable protection for the structural fabric of your home. Getting it right the first time is significantly less expensive than fixing it after the damage has become visible.
No. Ceramic and porcelain tiles are individually waterproof, but the grout between them is not. Standard cement-based grout absorbs water with every shower event. The waterproof membrane installed beneath the tiles is what prevents water from reaching the building structure. A tiled shower without a compliant membrane beneath it is not a waterproof shower, regardless of how the tiles look on the surface.
Shower waterproofing in Australia is governed by AS 3740:2021 (Waterproofing of Domestic Wet Areas) for installation requirements, and AS/NZS 4858:2004 (Wet Area Membranes) for membrane product performance requirements. Both are referenced by the National Construction Code 2022, adopted nationally from 1 May 2023.
When correctly installed on a properly prepared substrate with a quality product meeting AS/NZS 4858:2004 Class III, a liquid applied membrane has a service life of 10 to 15 years. Most reputable membrane manufacturers offer a 10 year product guarantee when the product is installed to specification.
The silicone sealants at junctions and screen frames have a shorter service life of 5 to 8 years in most Australian coastal climates and require periodic replacement as a maintenance item.
The minimum dry film thickness after full curing is 1mm on shower floors and 0.5mm on shower walls, applied as two coats perpendicular to each other. These measurements are post cure, not wet film during application.
Remedial membranes can be applied through the grout joints of an existing tiled shower as a short-term surface treatment where the underlying membrane is confirmed intact, and the substrate is dry and structurally sound. This does not constitute a compliant NCC 2022 waterproofing installation and does not repair or replace a failed membrane. For new construction and full renovation projects, the membrane must be applied directly to the prepared substrate beneath the tiles.
Yes. Retiling requires tile removal, which can disturb or damage an existing membrane. The existing membrane condition cannot be verified from the surface, and an unknown condition membrane cannot be relied upon as the waterproofing system for the new tiled installation. NCC 2022 requires the full waterproofing system to be reinstalled to current standards before new tiles are applied.
Yes. QBCC licensing is mandatory for wet area waterproofing work on residential properties in Queensland. An unlicensed person cannot issue a Form 43 compliance certificate, which is required for building inspection, for insurance claims related to the waterproofing work, and for the statutory warranty entitlement under Queensland building law. Verify the QBCC licence of any contractor at qbcc.qld.gov.au before signing any agreement.
Shower leaks in relatively new renovations are most commonly caused by installation defects rather than product failure. The three most frequent causes are: membrane cracking at junctions where bond breakers were not installed, delamination from the substrate where primer was omitted, and membrane failure in areas where insufficient thickness was applied or tiling commenced before the membrane cured fully. A licensed waterproofer can assess which failure mode applies with a visual inspection after any accessible tiles are removed.